
A stylish curtain rod can easily complement the beauty of your curtains through its subtle embellishment power. Installing an adjustable curtain rod can appear difficult but it’s actually quite easy if you’re careful about doing all the proper preparations beforehand. These rods can be used for disguising design defects which makes it very important to mount them correctly if you wish to take advantage of this ability.
By placing the curtain rod higher, you can obtain a height-enhancing effect that’s welcomed in areas with low ceilings. If your windows are too narrow and there’s too much empty wall space around them, the curtain rod can be extended to create a more balanced visual style. Take a look at our user-friendly instructions to figure out the best way to install your curtain rod.
1. Figure out the Exact Placement of the Curtain Rod
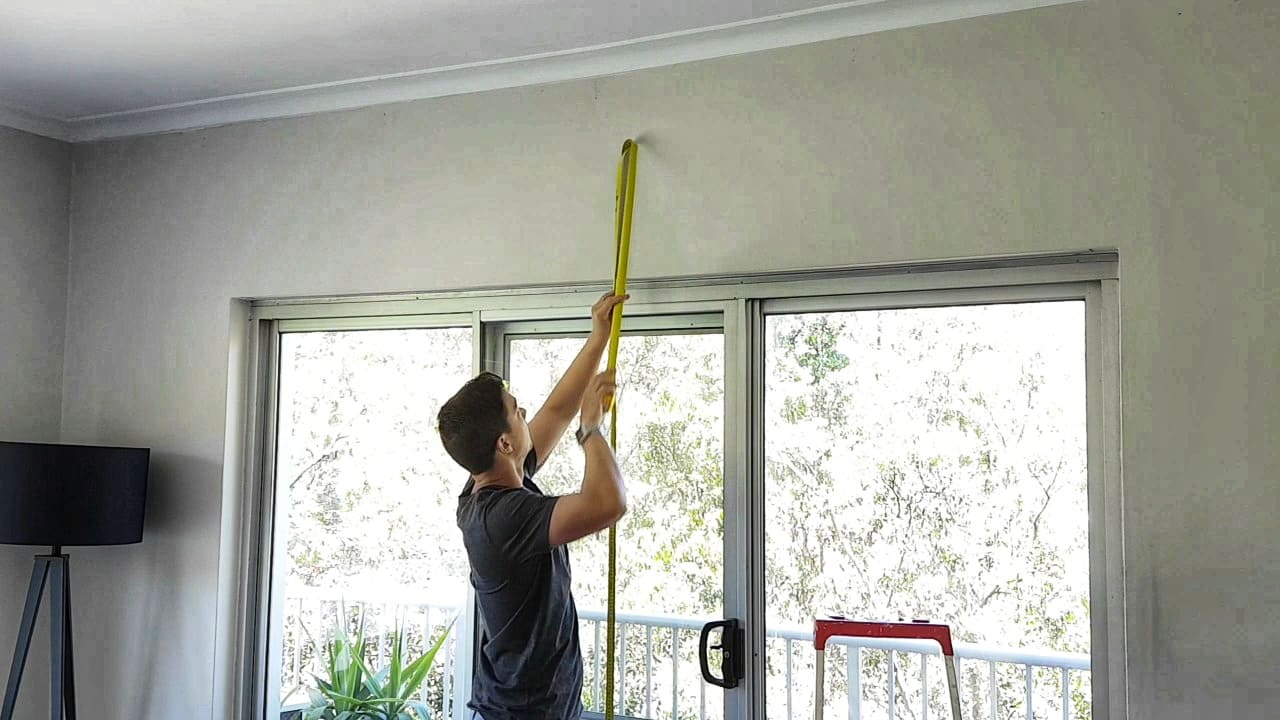
It comes down to personal preference but the style of the chosen curtains is also important when trying to figure out where to place the curtain rod. Use a measuring tape to figure out more precisely where the curtain ends and which should be the top where the rod is positioned. Mark two points on each side of the wall and make sure they’re even with a laser level. Establishing the height of the rod is essential for the curtains to look as expected when installed.
2. Install the Brackets
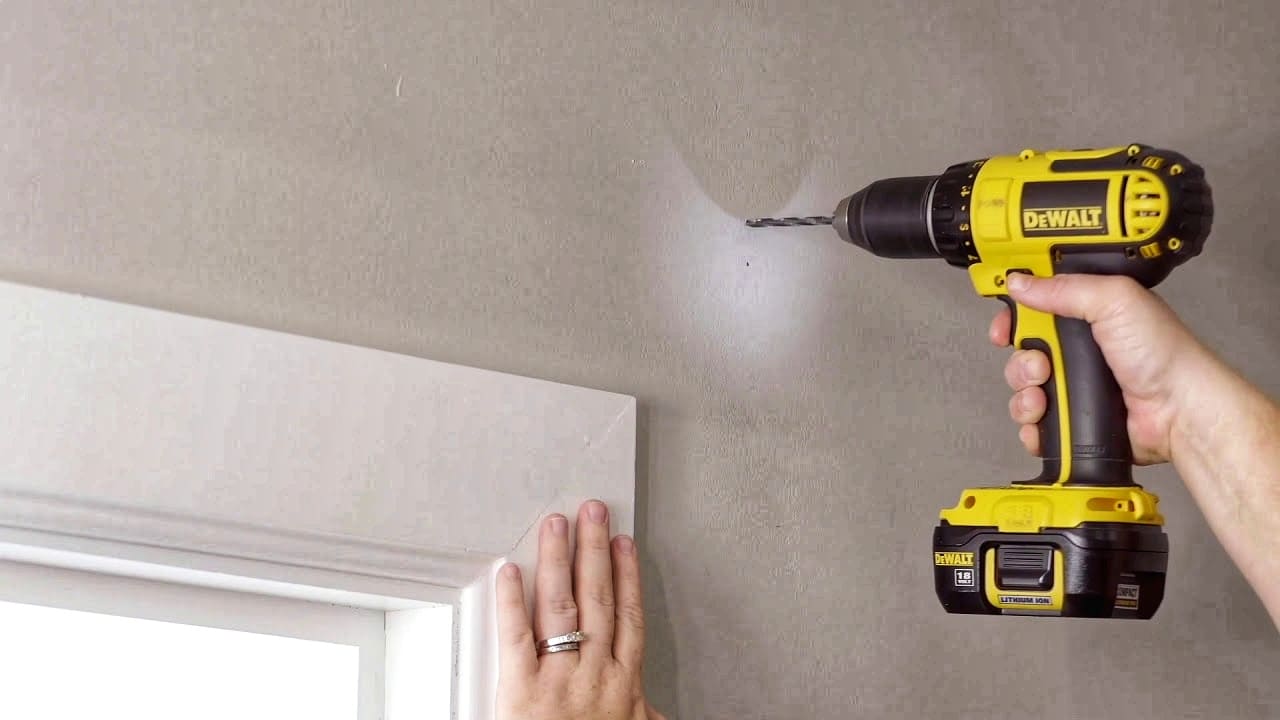
Curtain rods are designed to support the weight of your drapes with the help of sturdy brackets. After you’ve figured out exactly where the curtain rod should be mounted, it’s time to mark where the brackets will be installed. Use a pencil to mark the location of the pilot holes for the screws.
Most curtain rod brackets are typically installed directly on the wall rather than the wall casings. If screw anchors are required, you need to drill larger pilot holes to ensure an adequate fit. With the holes drilled, you are ready to screw the brackets and install them securely in the chosen place. Use the suggested mounting screws from the manufacturer of the curtain rod.
3. Insert the Rod
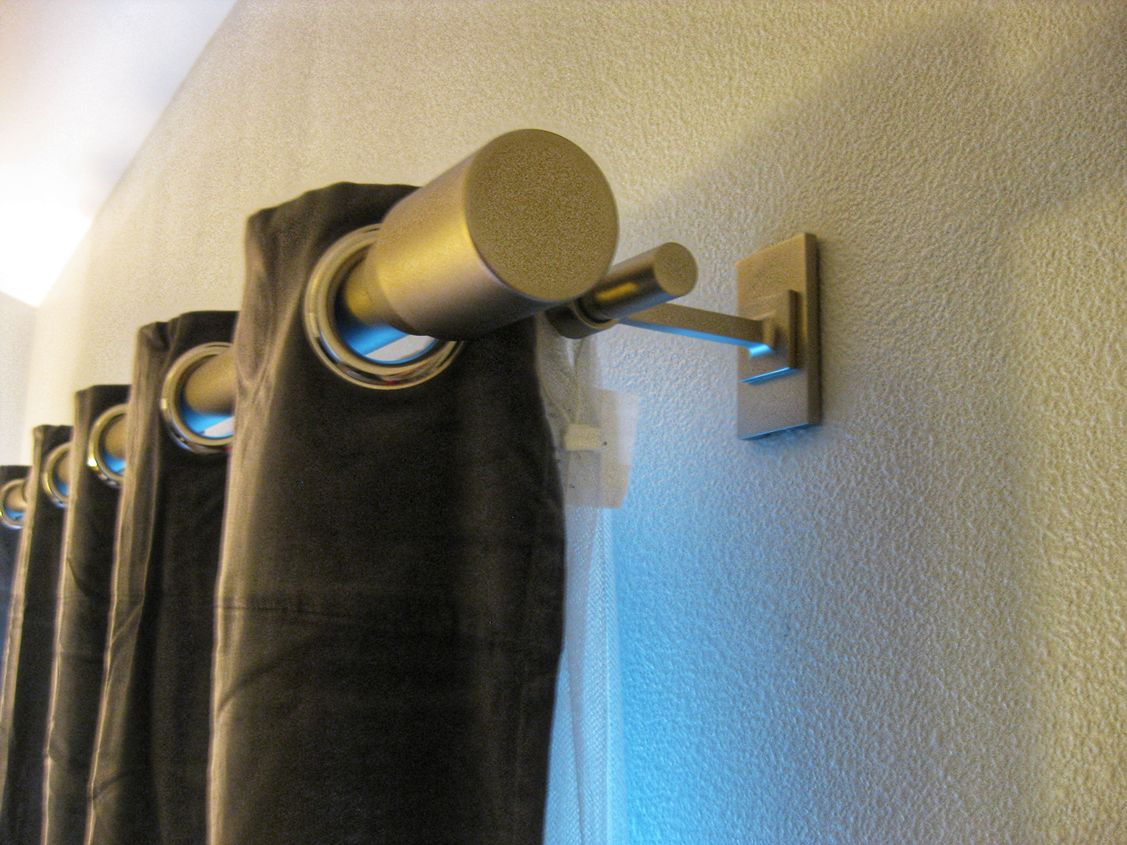
Place the rod onto the brackets and check to see if it sits evenly with the help of a carpenter’s level. If you did the initial markings correctly when positioning the curtain rod, there should be no problems with an uneven rod. The only thing left to do after fitting the rod in place is to put the curtains on it.

Leave a Reply