
Contents
- 1. What are the Benefits of Basement Waterproofing?
- 2. Causes of Basement Moisture and Flooding
- 2.1 Poor Drainage
- 2.2 Cracked Foundation
- 2.3 System Failure
- 2.4 Condesantion
- 2.5 Inadequate Basement Sealing
- 3. Basement Waterproofing Methods
- 4. Interior Basement Waterproofing
- 5. Preventing Basement Leaks
- 6. Subtle Signs that Basement Waterproofing is Required
- 6.1 Mold
- 6.2 Musty Odor
- 6.3 Efflorescence
Instead of frustrating small attempts to deal with water issues in the basement, it’s worth considering a complete waterproofing of this area so you can finally solve the problem once and for all. Most homeowners don’t really worry about water intrusion in the basement but it can be very hard to deal with it once the problem arises. It could be tempting to just ignore the water seeping in the basement if it doesn’t seem to pose a big threat to the home. This is not a recommended course of action because the water in the basement can create all kinds of problems in the long run.
1. What are the Benefits of Basement Waterproofing?
Without proper basement waterproofing, you run the risk of water damage directed towards the home as well as to your health. It’s not a good idea to allow the basement to become a moldy and unpleasant environment that makes the area unusable. Even if you’re not going down into the home’s basement very often, it’s still highly recommended to get this area waterproofed. Because concrete is a porous material, basement waterproofing doesn’t technically mean full water elimination. It’s more like a reliable system that enables controlled water penetration and efficient removal of all that damaging moisture.
One of the most important aspects when it comes to waterproofing the basement is to prevent the water from sitting in the wall. It may not seem like such a big problem initially but you can discover serious foundation damage in the long run if the water isn’t dealt with. This is especially an issue to consider if your basement walls are painted or covered by materials that force the water to remain in the wall.
2. Causes of Basement Moisture and Flooding
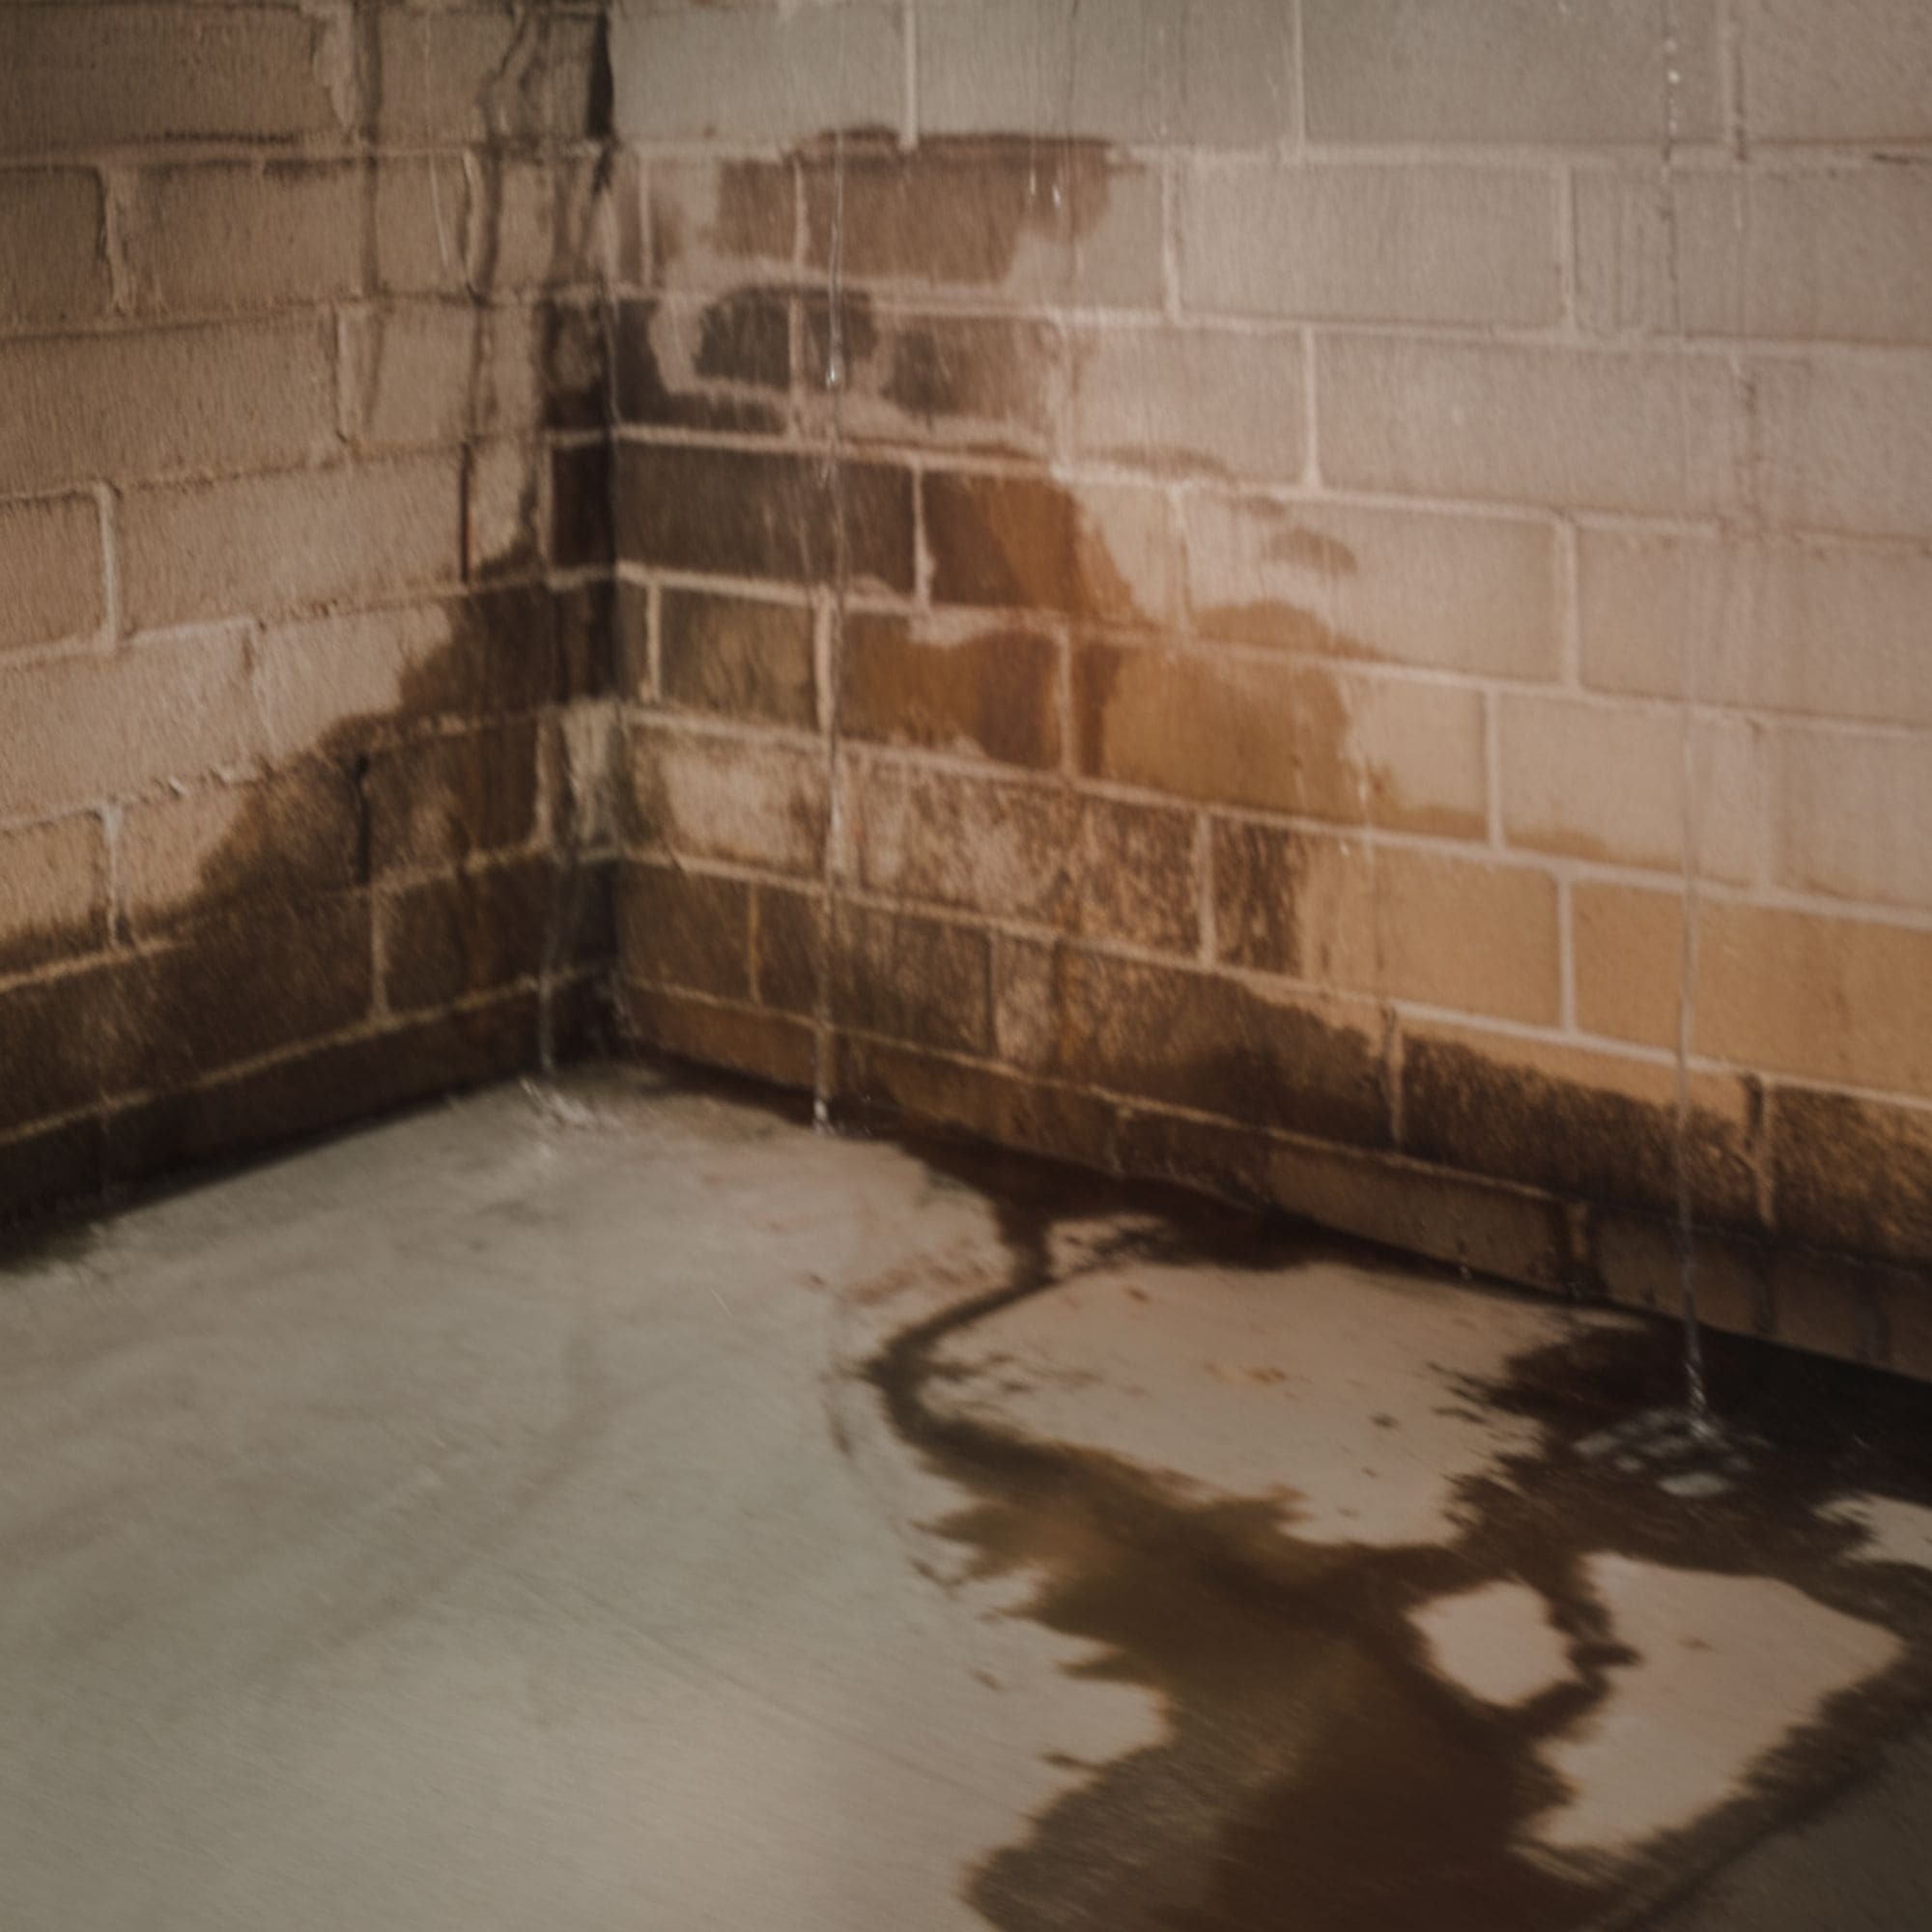
Understanding the problem you’re facing is an important step towards resolving it. Basement flooding is a fairly common issue that can affect all kinds of homes. It doesn’t always take wet weather to create the proper conditions for this unfortunate event. You might think that your basement is reasonably protected but moisture infiltration can come unexpectedly. It’s time to learn how to steer clear from disastrous flooding.
2.1 Poor Drainage
Having poor drainage on the entire property can lead to accumulated moisture in the basement. When the gutters get clogged easily or the whole drainage system isn’t doing its job, moisture in the basement is usually a sure warning sign to take action.
2.2 Cracked Foundation
Cracks can appear in the foundation because of water so it’s not surprising to see a connection with your basement moisture issues. Poorly drained soil often affects the foundation and helps the formation of cracks through the strong generated pressure. In the end, it’s not really essential to figure out the exact cause of the cracks. The important part to remember is that you need to seal those cracks to stop water leakage.
2.3 System Failure
The basement is the preferred place to keep some household systems functioning. Homeowners can face regular issues whether it’s the sump pump not working or a big appliance leaking water. These system failures will cause unwanted moisture in the basement or flooding in the worst cases.
2.4 Condensation
The meeting of warm air with the cool walls of the basement results in moisture from condensation. The same process that affects the glass of your cold beer in the summer can appear in the basement. Condensation has many negative effects in the basement, from rusting appliances to causing woot to rot. It also creates the proper breeding ground for insect infestation.
2.5 Inadequate Basement Sealing
If you attempt to seal the walls and floor of the basement against water leaks, it’s important to do it right because a poor job will give you a false sense of security against the moisture. Improper sealing will still make the basement vulnerable to flooding or other issues.
3. Basement Waterproofing Methods
3.1 Exterior Basement Waterproofing
By far the best method to keep excessive water away from the basement involves exterior waterproofing. Unfortunately, this is also the most complicated solution that will usually require soil excavation, a building permit, and the services of a licensed contractor. You should only decide to go down this route if you truly want to accomplish complete basement waterproofing.
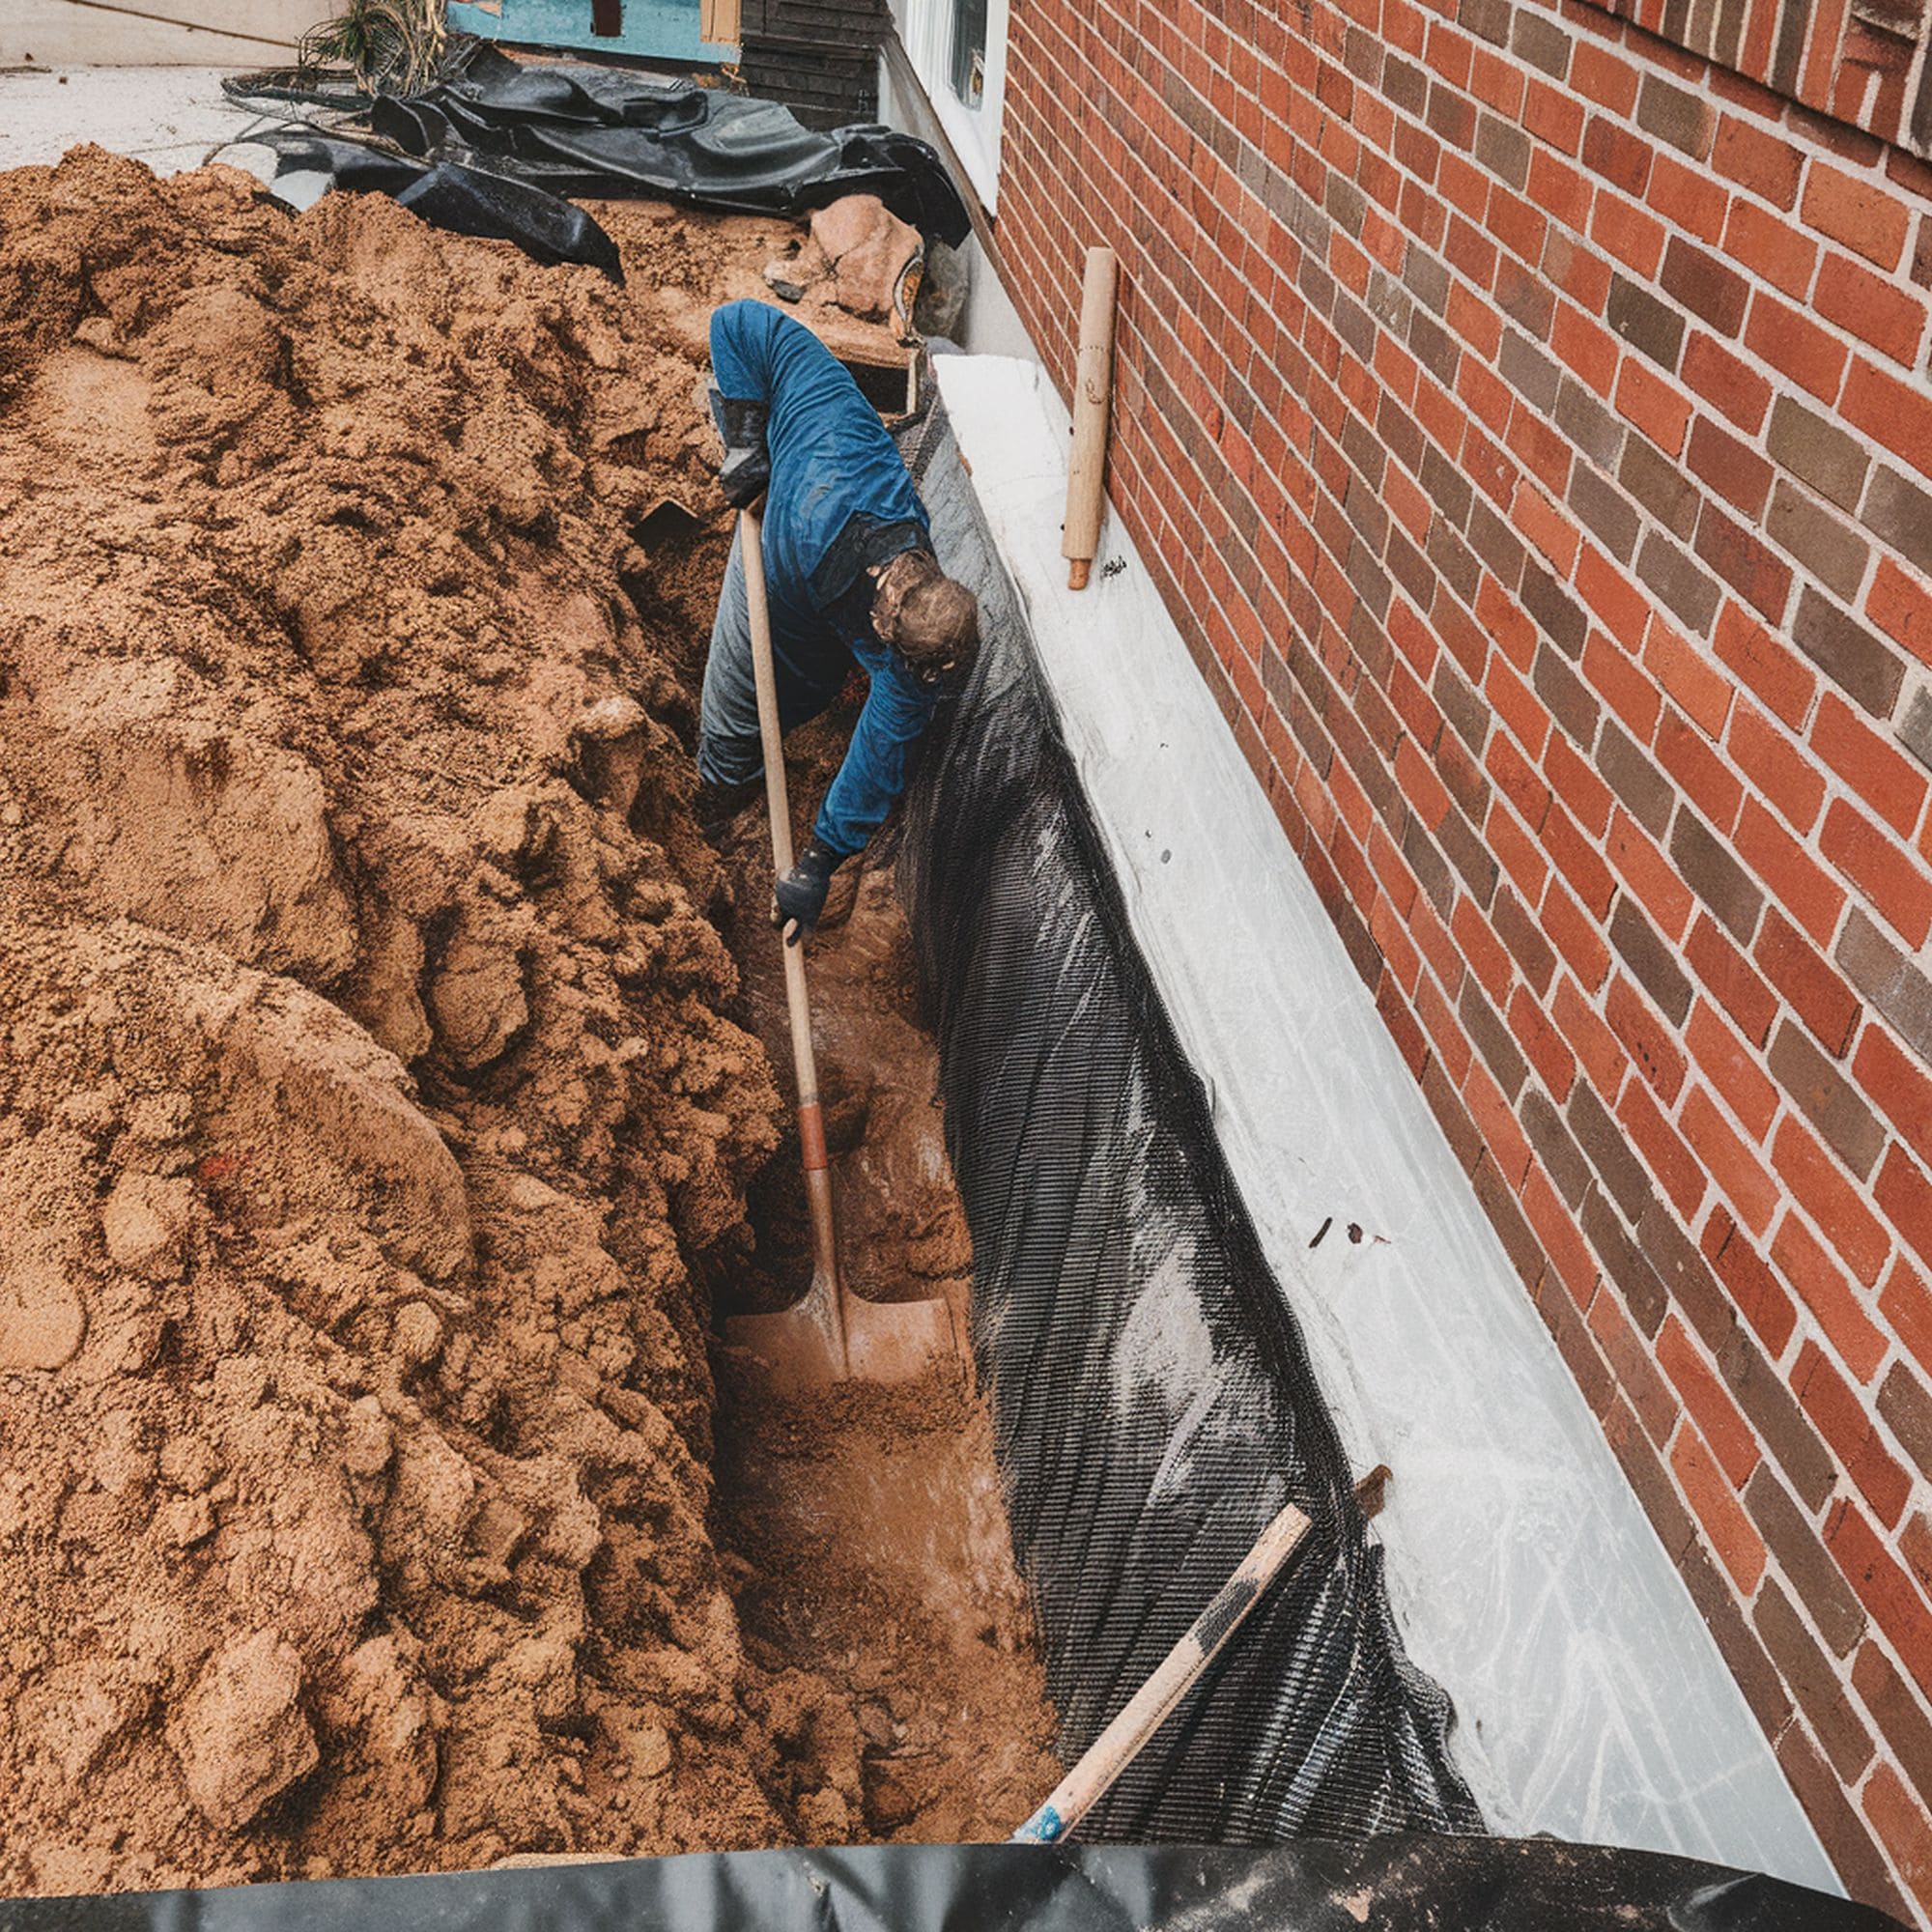
3.2 Start Excavating
The excavation process starts by having to dig around the outer perimeter of the basement. You will need to remove all the soil to reveal the exterior of the foundation where a special product has to be applied over the walls. Although it can be difficult to decide on the right waterproofing product, it’s usually advised to opt for drainage tiles or stone drains. There are various approved materials or systems that can be successfully used to obtain reliable waterproofing results.
It’s easy to see why this is a fairly complicated method that shouldn’t be everyone’s first choice. External waterproofing is highly effective but quite expensive. It’s also potentially dangerous because there’s a risk of causing other issues to the home’s foundation during the excavation process. Professional contractors can help you minimize the risks involved. They will also take into account the timing so the waterproofing project can be done during a dry season.
3.3 Install a Sump Pit
When it comes to installing drainage tiles, there are other aspects to keep in mind. The process usually involves the need to add a sump pit where the accumulated water needs to be pumped out. You will have to select the best place to install the sump pit. Another important detail that you shouldn’t forget about is the purchase of a sump pump for getting the water out to the surface. This high-performance Wayne sump pump from Amazon represents a recommended option.
3.4 Repair Cracks
It’s a good idea to check for cracks on the foundation walls after the excavation is done. Some areas can be more prone to water damage so it’s best to identify these cracks and repair them. You will need hydraulic cement that can withstand leakage issues and can fill in the cracks evenly. Even if you miss some cracks, you should apply a sealant coating designed for outdoor concrete and masonry surfaces. It will ensure that concrete pores won’t be exposed to water when the sealant hardens. Try the Black Diamond Stoneworks sealer from Amazon for a durable gloss.
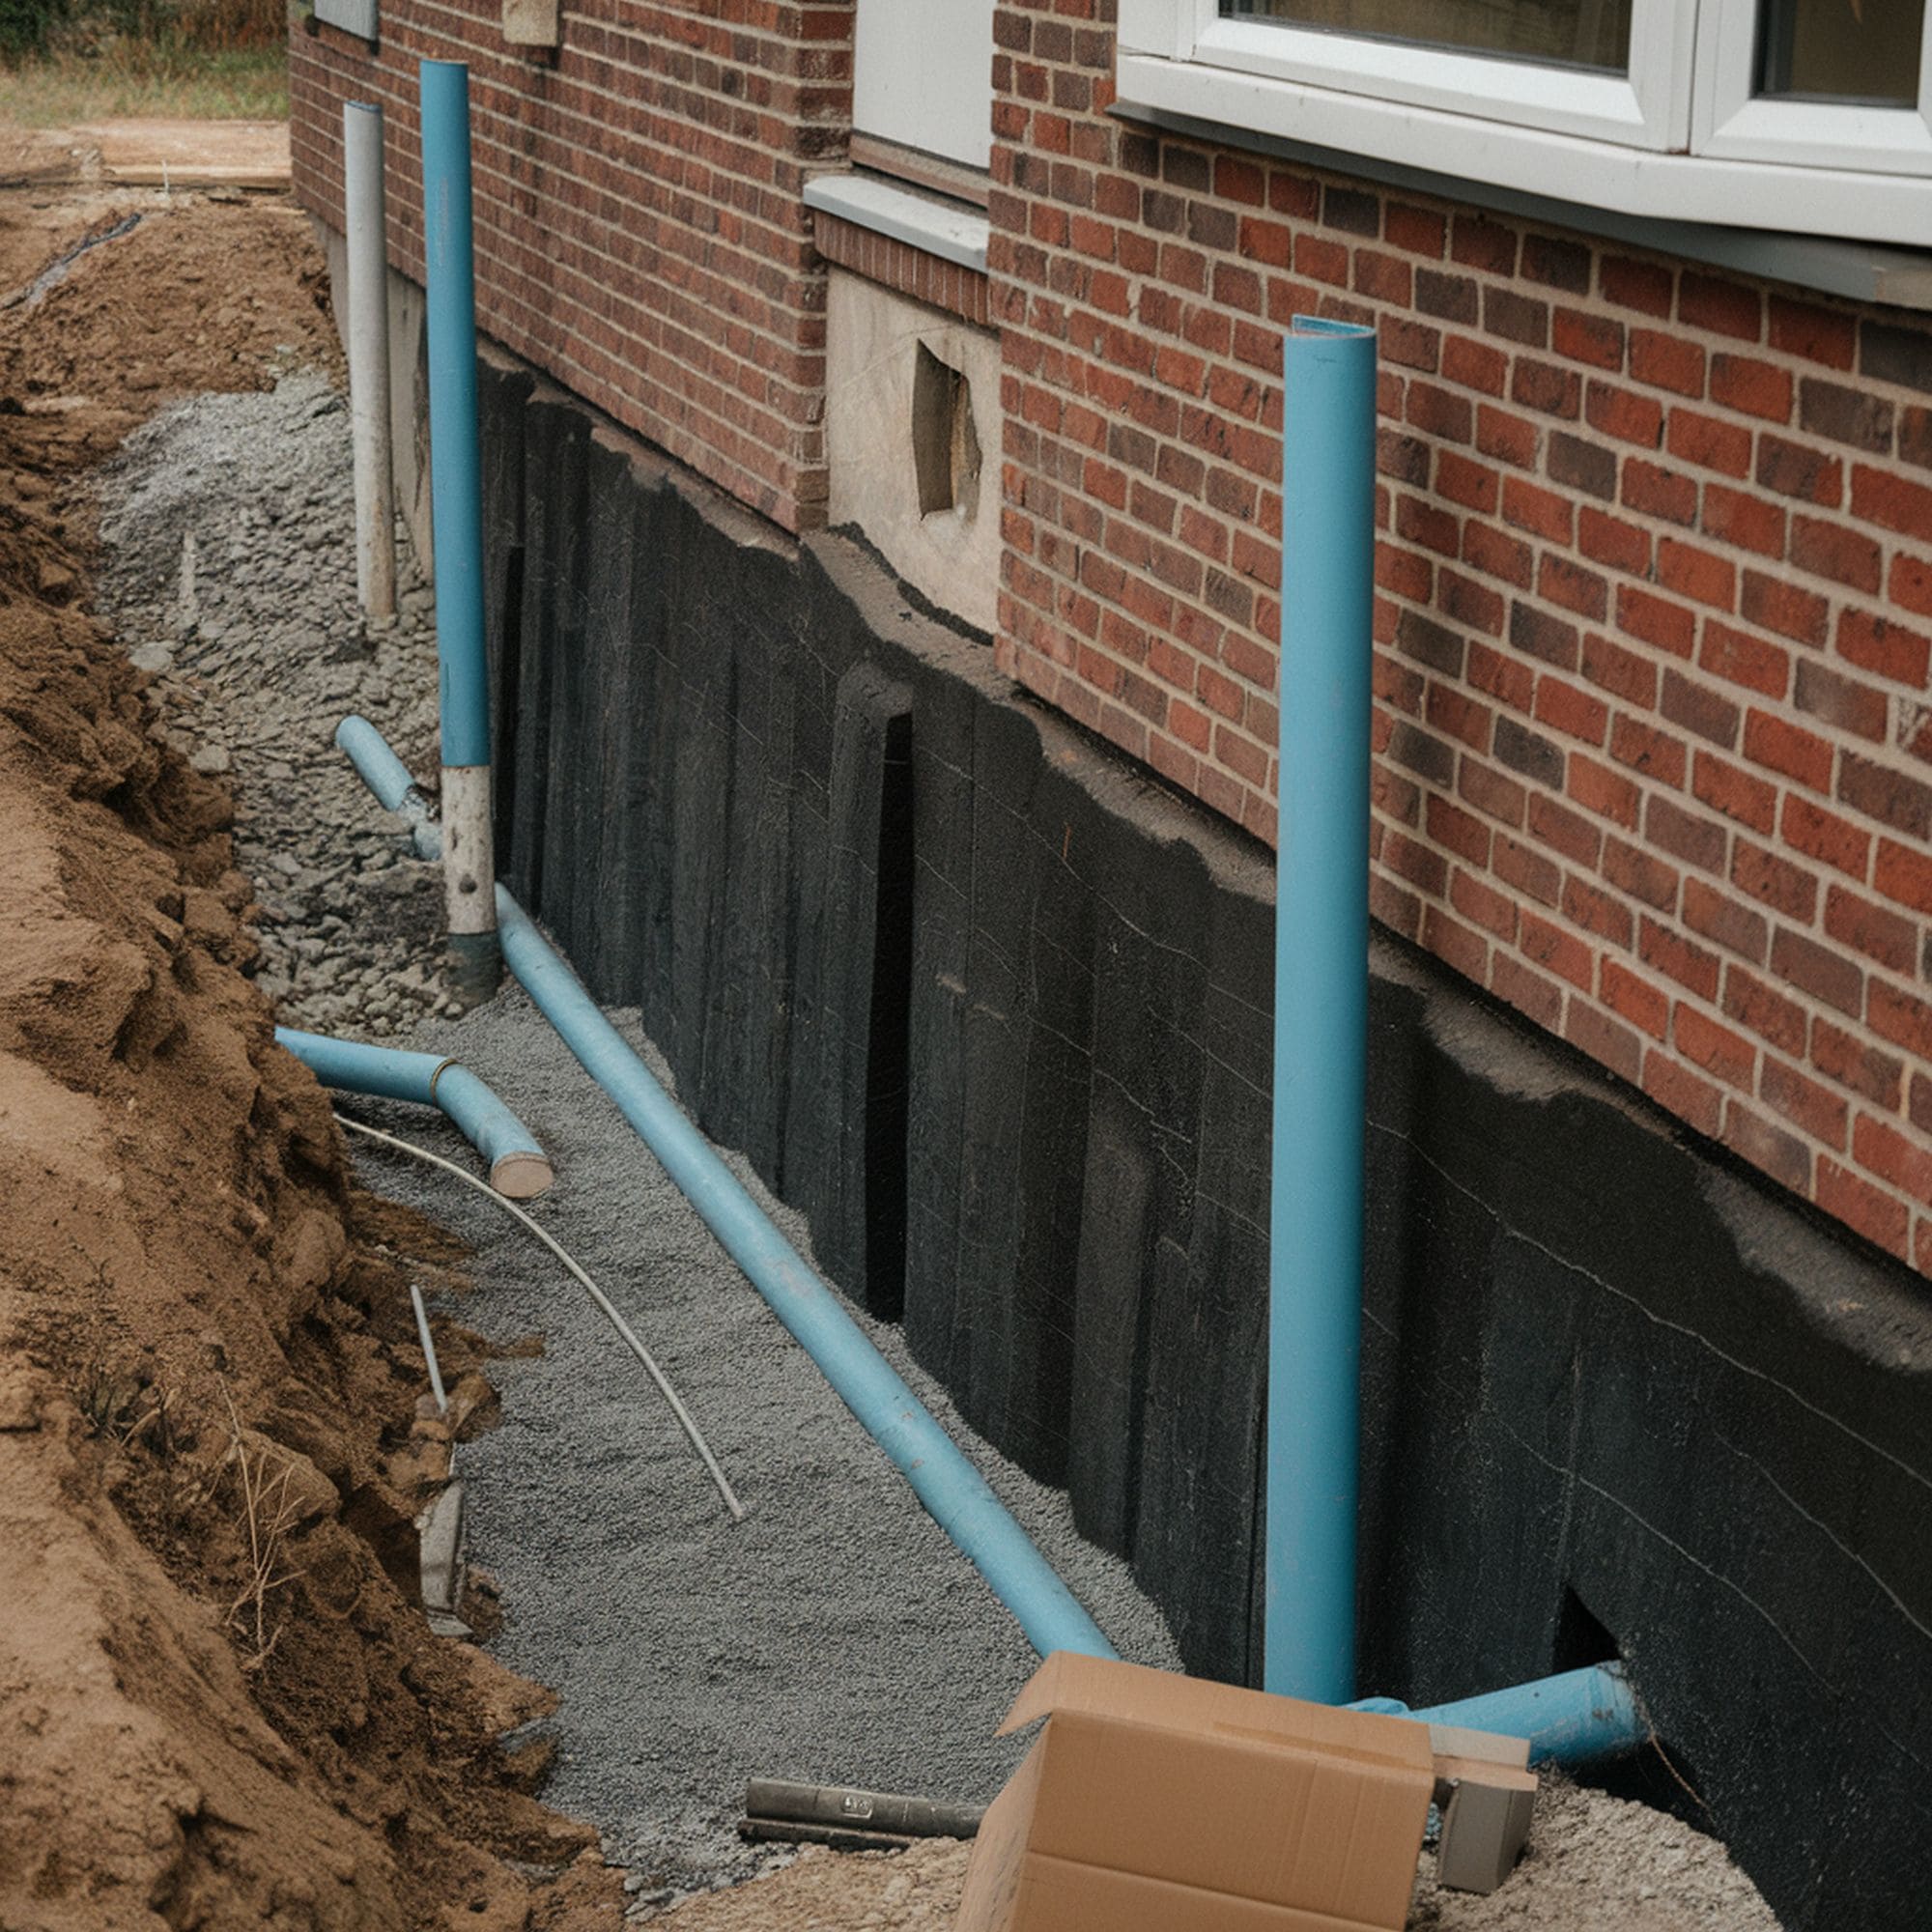
3.5 Apply A Membrane
The waterproofing membrane could be a must-have addition for creating a reliable seal of the foundation. It’s recommended to apply an elastomeric membrane crafted from asphalt-modified polyurethane that will be able to prevent future cracks. This is an important step because the flexibility of the membrane ensures adaptability for new occurring cracks. Make sure you choose the correct product because damp-proofer membranes won’t be enough. It has to be a sturdy waterproof type of membrane.
3.6 Install The Drainage Tile
The process of installing the drainage tile starts with adding a special mat with molded dimples. This is required so that moisture can be effectively redirected to the drain structure. It’s important to build the drainage mat according to the specific depth of the foundation. Then you can finally install the drainage tile that needs to be backfilled with gravel. Consider adding some cleanouts in the process to perform maintenance as required.
All in all, exterior basement waterproofing represents a costly project that will easily exceed a few thousand dollars. If you’re really determined to get rid of water leaks, this is certainly the best method to try. Alternatively, consider a different approach that we’ll take a look at in the next section.
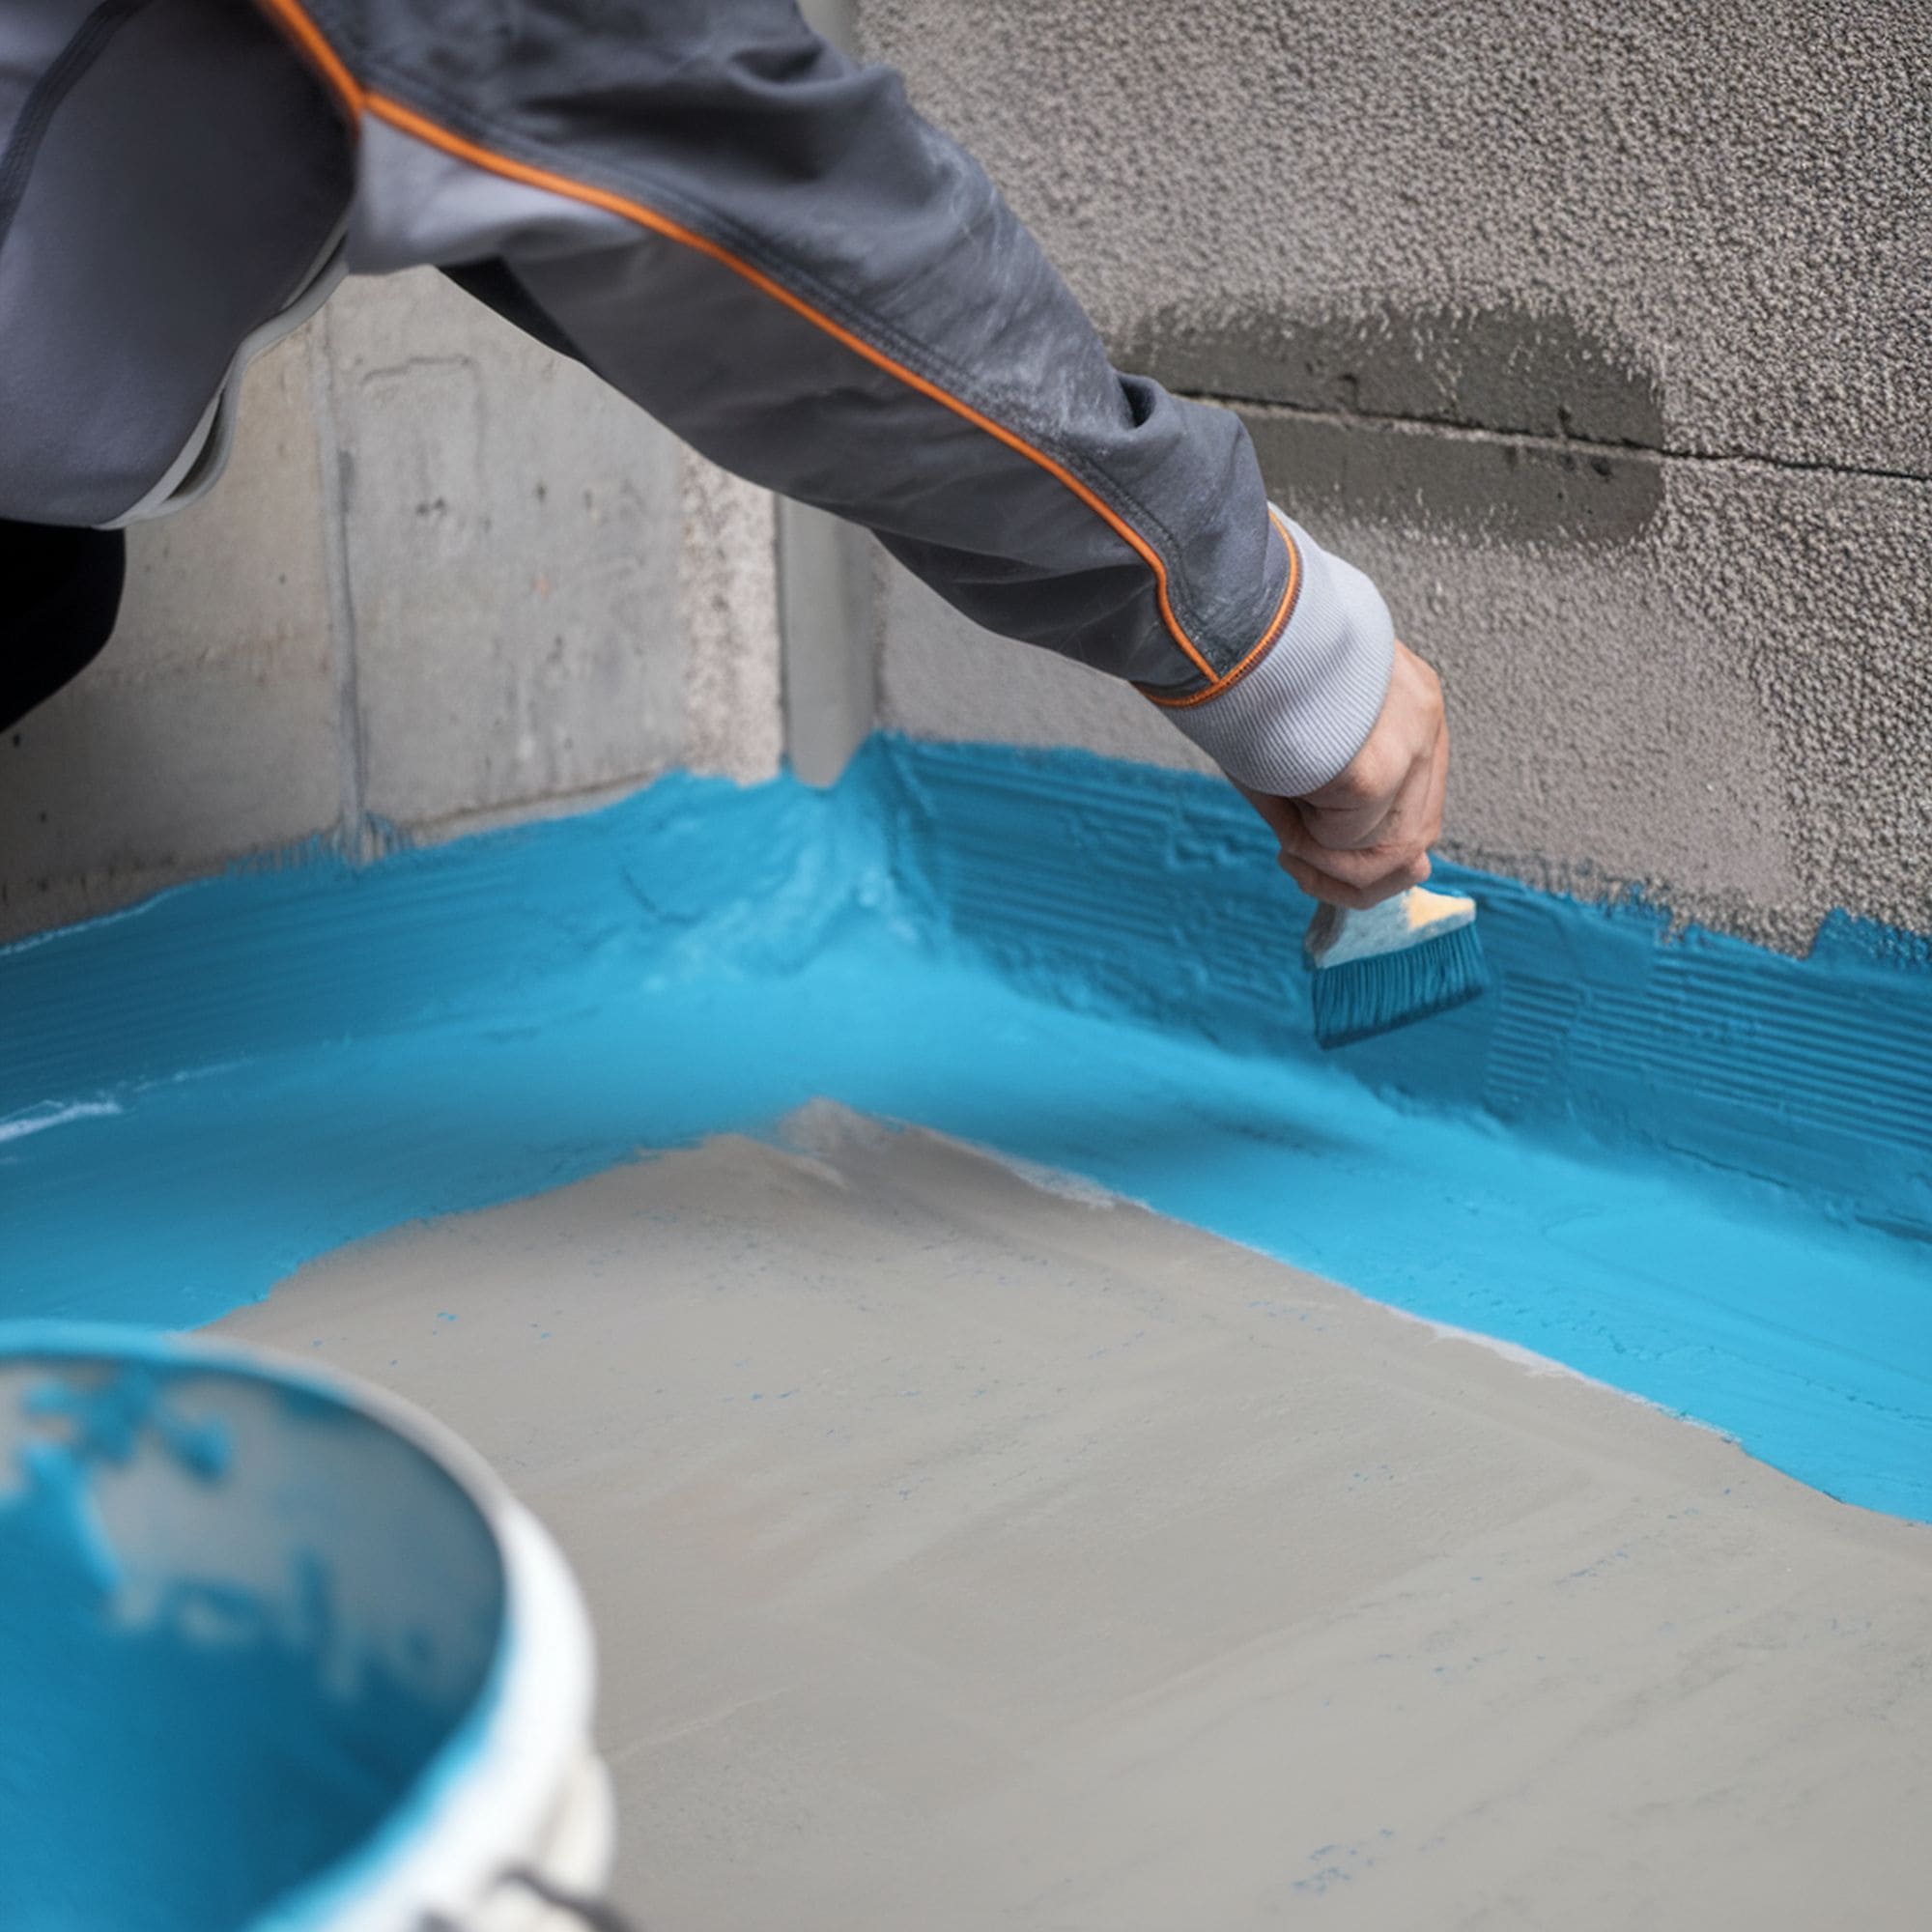
4. Interior Basement Waterproofing
A simpler and more convenient waterproofing method for the basement refers to using a capable interior sealant or a powerful floor drainage system. This kind of remedy will not be a solid solution for serious leakage problems but it’s a great method to try if excavation is not possible.
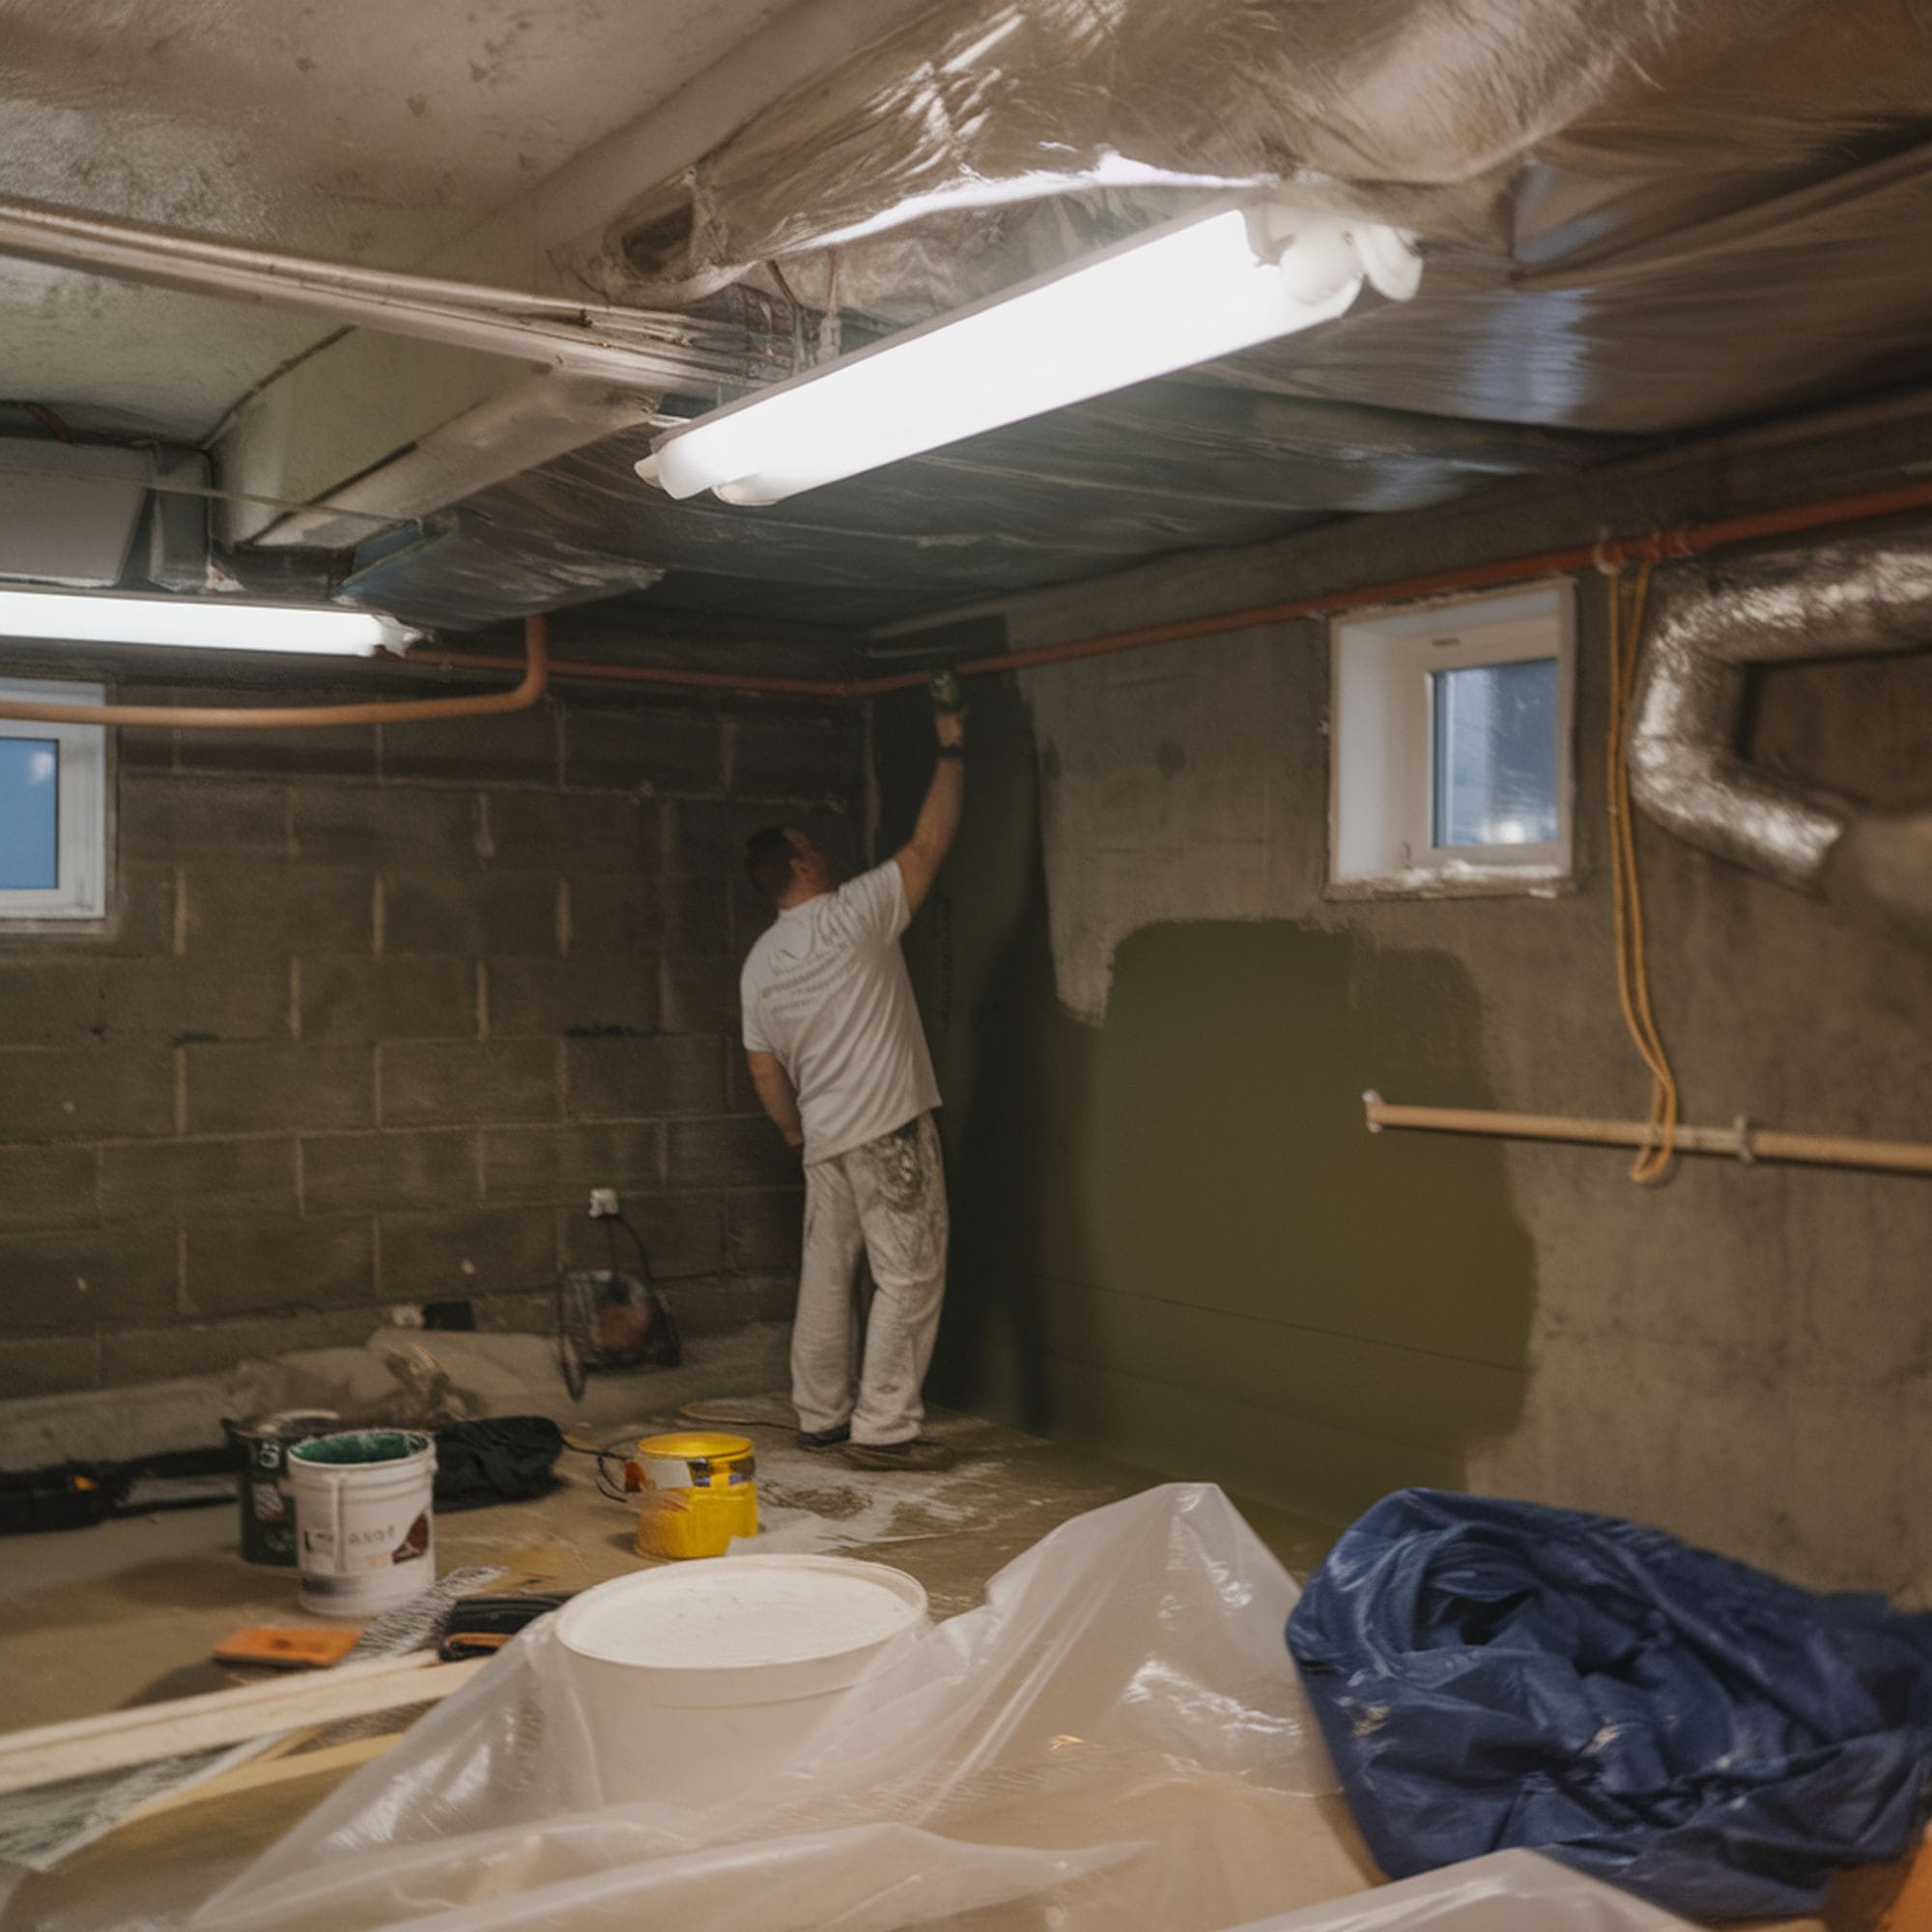
4.1 Choose an Interior Masonry Sealant
A high-quality interior sealant designed to work with concrete and masonry could be the best choice for dealing with some small, damp cracks that leak water. Keep in mind that even the most expensive interior sealant products will not work on painted walls because poor contact translates to weak results.
Interior sealants for waterproofing your basement are often available in one-gallon containers or larger buckets that can reach a capacity of five gallons. Depending on certain factors such as the size of the treated surface or the severity of the cracks, it may be necessary to apply more coats so make sure you purchase an adequate amount of sealant to match your needs. Check out the Kilz interior sealer for masonry and concrete from Amazon. It offers both low or high gloss styles at an economical cost.
4.2 Install an Interior Floor Drain System
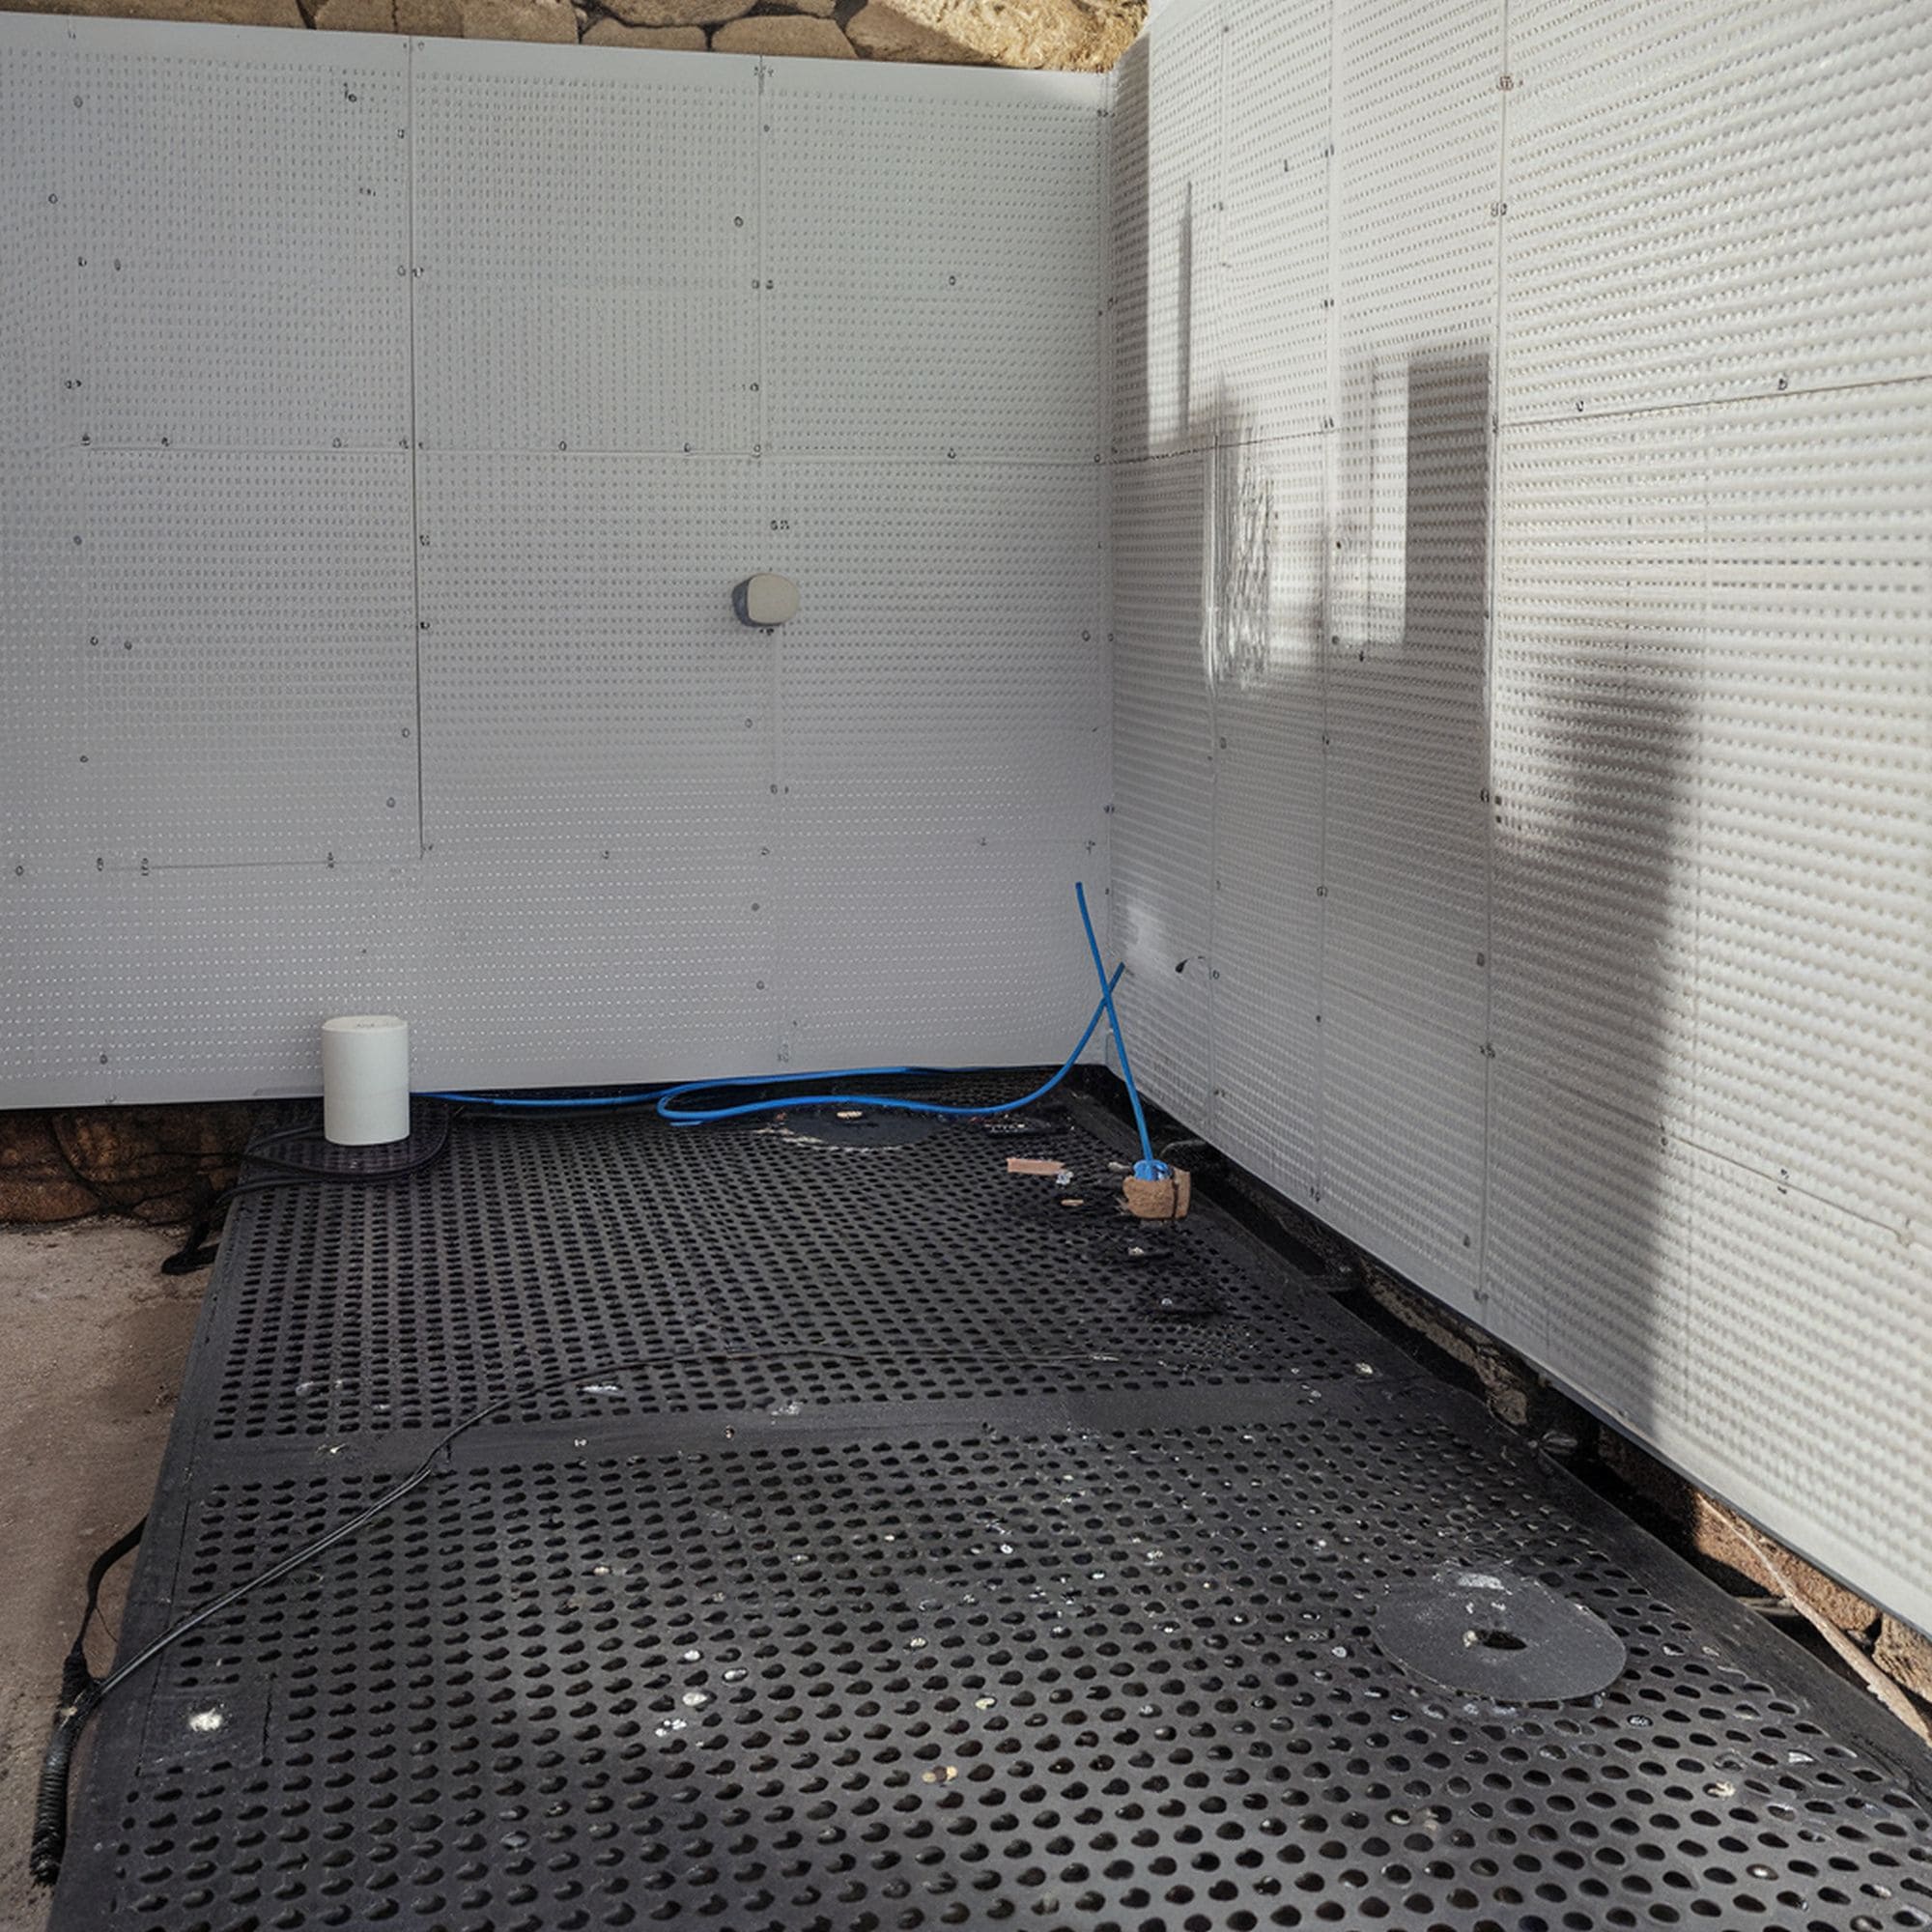
Although performant interior concrete sealant products should work well for most minor cracks, tougher jobs will require more complex waterproofing methods. Installing a floor drain system on the interior of the basement represents a solid solution. It resembles the exterior process but there’s only minimal excavation required to get a nice trench along the walls in the basement.
While it may not be as complicated as an exterior excavation, you will still need special tools like a jackhammer and a concrete saw. Going the DIY route for this method isn’t really recommended considering the effort required. You will also have to deal with the created mess so it’s worth finding a professional contractor to help.
An interior floor drain system consists of the perforated rain tile and gravel where the moisture is collected. You will need to add a sump pit and finish the project with a narrow grate over the trench to keep the area looking nice and clean. Plastic panels on the walls could be required to direct the seeping water more effectively towards the drain.
5. Preventing Basement Leaks
Keeping the basement as dry as possible always starts by taking the right precautions. The role played by the basement in your household doesn’t matter. Some homeowners make it a storage space while others turn it into a living area. Regardless of your goals, everyone likes to maintain the basement free of excessive moisture. Here are some of the best preventative methods that contribute to waterproofing the basement:
5.1 Water Runoff
Take a closer look at the way your house is built. This could be an essential detail that potentially causes water runoff as sloped homes tend to have water leakage issues in the basement. This kind of vulnerability needs to be discovered early to prevent a flooding disaster. If you observe potential water runoff issues, it’s best to contact a specialized company that will help you waterproof the basement while taking this situation into account.
5.2 Wrong Gutter Position
Even if you’re confident that your gutters work as expected, they should still be inspected from time to time. Regular maintenance of the outside drainage system can save you a lot of time and money when it comes to dealing with basement water leaks. An improperly positioned gutter is often the culprit if you notice moisture accumulated in the basement.
Gutters need to protect the home’s foundation by redirecting water away but sometimes things can go wrong. You can discover that water is actually directed towards the basement. Check the gutter’s downspout carefully to see if it’s faulty. Another thing to try is installing a flexible downspout extension to improve rainwater diverting efficiency. Here’s a great model from Amazon.
5.3 Never Ignore a Small Leak
Basement moisture problems develop over time. Having a small leak will not immediately lead to severe flooding issues but it’s best to pay attention to it. Ignoring a small crack in the wall will usually lead to more costly repairs in the long run. Regularly checking the basement for leaks could be a smart decision to identify moisture problems before requiring complex waterproofing methods of the whole area.
6. Subtle Signs that Basement Waterproofing is Required
It’s usually obvious that you’re dealing with basement water leakage issues but sometimes the problem can go unnoticed. There are more subtle signs that you should watch out for so you can start the waterproofing project before things get out of hand.
6.1 Mold

Even if you don’t use the basement on a regular basis, it’s very important to prevent mold from growing in the basement. Check the walls of the basement carefully to see whether mold spores are visibly growing. Even a bit of mold can indicate potentially great water leakage issues. The mold in the basement is a serious health hazard that needs to be dealt with quickly before it spreads further.
6.2 Musty Odor
Sometimes it’s not even necessary to inspect the walls of the basement closely to figure out whether basement waterproofing is needed. Sensing a strange odor can quickly indicate moisture leakage. If you smell something musty or damp in the basement, don’t hesitate to further explore the problem. Even if you don’t see visible signs of wetness, it’s safe to say that you should start thinking about waterproofing methods.
6.3 Efflorescence
When water penetrates concrete or other materials, the salt is brought to the surface. This is called efflorescence and it can be a very subtle sign of moisture in the basement. It consists of some white marks left on the walls. While efflorescence it’s not as alarming to see as mold, this is still something definitive that indicates the need for basement waterproofing.

Leave a Reply