
Quick Recipe Version (TL;DR)
Quick Ingredients
- 2 cups (240 g) masarepa (precooked white cornmeal)
- 2 tbsp (25 g) sugar or grated panela
- 1/2 tsp fine salt; 1/2 tsp baking powder (optional)
- 1 cup (240 ml) whole milk, lukewarm
- 3/4 cup (180 ml) lukewarm water
- 2 tbsp (28 g) melted butter + 1 tbsp (14 g) for the griddle
- 4 oz (115 g) cuajada/queso fresco, crumbled
- 6 oz (170 g) melty cheese (mozzarella, quesillo, or queso campesino)
Do This
- 1. Heat oven to 375°F (190°C). Place a cast-iron or heavy skillet over medium heat.
- 2. Mix masarepa, sugar, salt, and baking powder. Stir in warm milk, water, and melted butter.
- 3. Fold in crumbled cuajada. Rest dough 10 minutes.
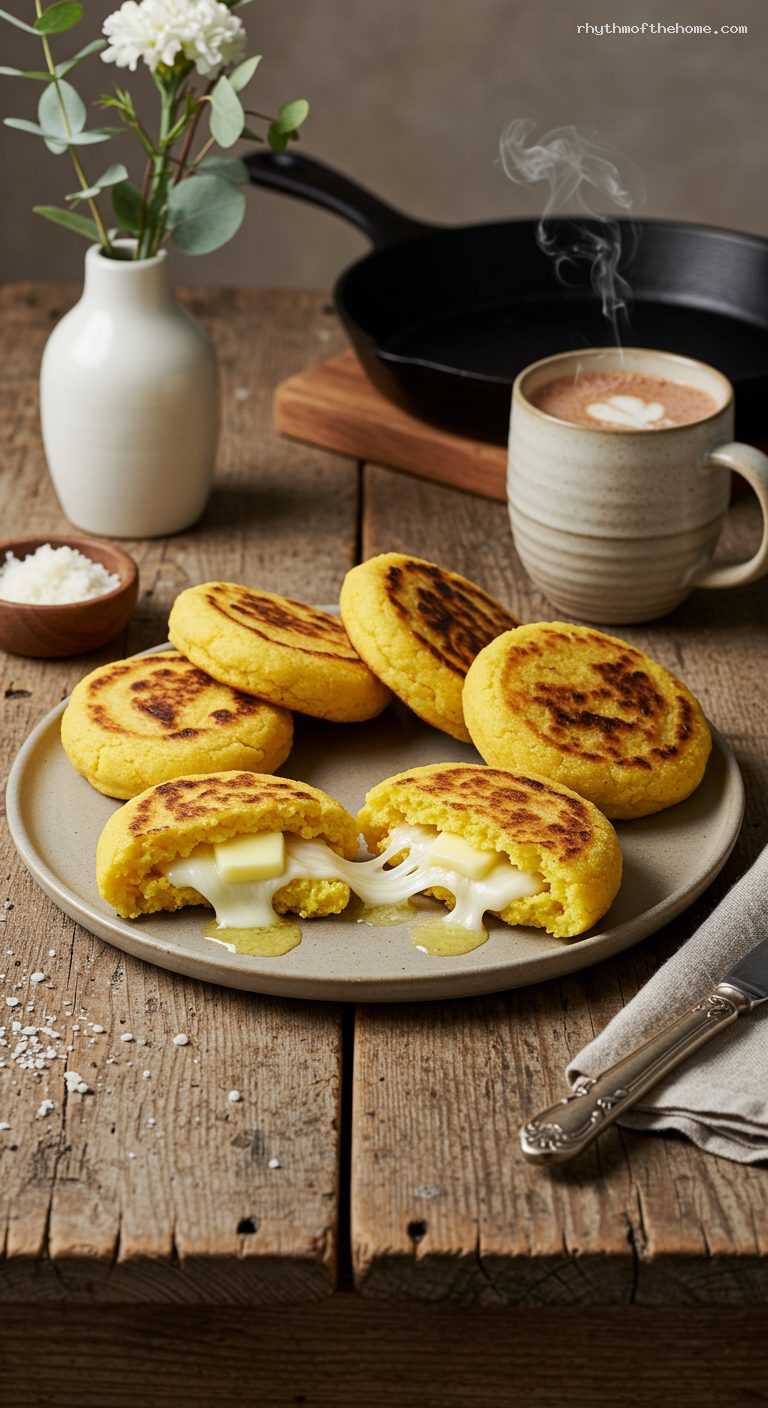
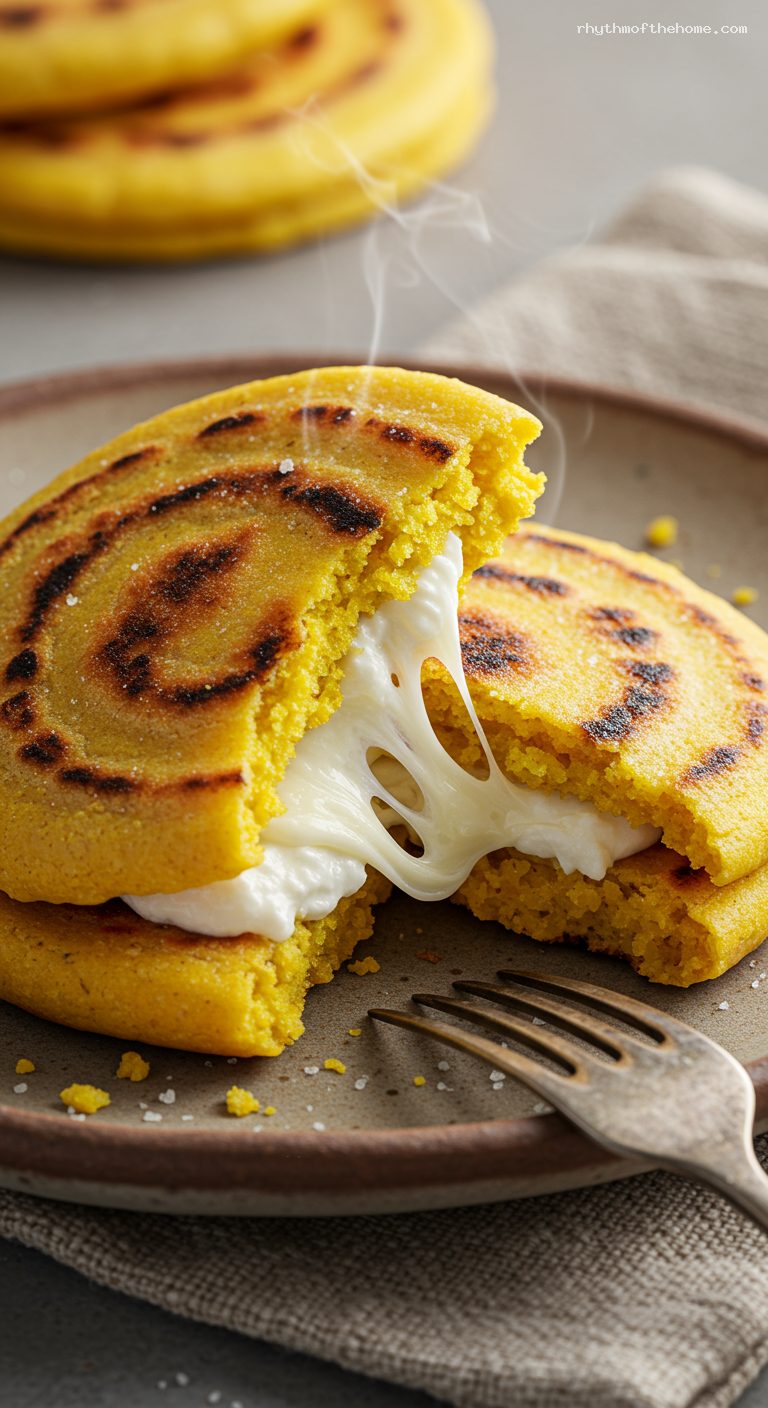
- 4. Divide into 6 balls. Flatten, add melty cheese, seal, then pat to 1/2–3/4 inch thick.
- 5. Grease skillet lightly. Cook arepas 4–5 minutes per side until golden and speckled.
- 6. Transfer to a baking sheet; bake 8–10 minutes to finish cooking and melt cheese.
- 7. Rest 2 minutes; brush with a little butter if you like. Serve hot with coffee or hot chocolate.
Why You’ll Love This Recipe
- Classic Boyacá flavor: a slightly sweet, tender corn dough enriched with cuajada.
- Melty center: stretchy cheese tucked inside a griddled, golden arepa.
- Reliable technique: griddle for color, oven to finish—no raw centers.
- Perfect with warm drinks: an ideal companion to Colombian-style hot chocolate or strong coffee.
Grocery List
- Produce: None
- Dairy: Whole milk, butter, cuajada (or queso fresco/farmer cheese), melty cheese (mozzarella/quesillo/queso campesino)
- Pantry: Masarepa (precooked cornmeal), sugar or grated panela, fine salt, baking powder (optional)
Full Ingredients
Dough
- 2 cups (240 g) masarepa (precooked white cornmeal, such as P.A.N.)
- 2 tablespoons (25 g) granulated sugar or finely grated panela
- 1/2 teaspoon fine sea salt
- 1/2 teaspoon baking powder (optional, for a touch of lift)
- 1 cup (240 ml) whole milk, lukewarm
- 3/4 cup (180 ml) water, lukewarm, plus 1–2 tablespoons more if needed
- 2 tablespoons (28 g) unsalted butter, melted
- 4 ounces (115 g) cuajada, queso fresco, or farmer cheese, crumbled
Filling
- 6 ounces (170 g) melty cheese (low-moisture mozzarella, quesillo, or queso campesino), sliced or shredded
For Cooking & Finishing
- 1 tablespoon (14 g) unsalted butter or neutral oil, for the griddle
- Optional: 1 tablespoon melted butter for brushing after baking
Step-by-Step Instructions
Step 1: Preheat and set up
Preheat the oven to 375°F (190°C). Place a cast-iron skillet or heavy griddle over medium heat to preheat. Line a baking sheet with parchment paper for the oven finish.
Step 2: Combine dry ingredients
In a large bowl, whisk together the masarepa, sugar (or grated panela), salt, and baking powder (if using). This evenly distributes the seasoning and helps prevent clumps.
Step 3: Make a supple dough
Stir in the warm milk, warm water, and melted butter. Mix with a spoon, then switch to your hands and knead gently until smooth and soft, about 1–2 minutes. Fold in the crumbled cuajada. The dough should feel moist and pliable, not sticky or crumbly. If cracks form, knead in 1–2 tablespoons of additional warm water. Cover and let rest 10 minutes to fully hydrate.
Step 4: Portion and fill
Divide the dough into 6 equal portions (about 110–120 g each). Working one at a time, flatten a ball into a 4-inch (10 cm) round. Add about 1 ounce (28 g) of melty cheese to the center, leaving a 1/2-inch (1.25 cm) border. Bring the edges up to enclose, pinch well to seal, then gently pat into a thick disk 1/2–3/4 inch (1.3–2 cm) thick. Smooth any cracks so cheese will not leak.
Step 5: Griddle until speckled
Grease the preheated skillet lightly with butter or oil. Cook arepas in batches, seam-side down first, 4–5 minutes per side until golden with deep brown speckles. Adjust heat as needed to prevent scorching—steady medium heat cooks the interior while developing color.
Step 6: Finish in the oven
Transfer the griddled arepas to the prepared baking sheet and bake 8–10 minutes, until slightly puffed, the centers are cooked through, and the cheese is fully melted. If desired, brush the tops with a touch of melted butter as they come out.
Step 7: Rest and serve
Let rest 2 minutes to allow the steam to settle and the cheese to become lusciously stretchy. Serve hot with a mug of Colombian-style hot chocolate or strong coffee.
Pro Tips
- Use masarepa (precooked cornmeal) only—do not substitute masa harina or standard cornmeal.
- Warm liquids help the dough hydrate and stay supple; if the dough cracks, add a teaspoon of warm water at a time.
- Keep cheese 1/2 inch from the edges and seal seams well to prevent leaks.
- Griddle first for color, then bake—this prevents raw centers and guarantees a melted core.
- For neat shaping, press dough between two pieces of plastic (a cut zip-top bag works well).
Variations
- Panela & anise: Add 1/2 teaspoon lightly crushed anise seeds and use panela for the sweetener.
- Queso y bocadillo: Tuck a thin slice (10–12 g) of guava paste with the cheese for a classic sweet-savory combo.
- Lactose-friendly: Use lactose-free milk and cheeses; the method remains the same.
Storage & Make-Ahead
Shaped, uncooked arepas can be refrigerated up to 24 hours (covered) or frozen for up to 1 month with parchment between each to prevent sticking. Cook from chilled as directed; from frozen, griddle 1–2 extra minutes per side and bake 2–3 minutes longer. Cooked leftovers keep in the refrigerator for 2 days; reheat on a hot skillet or in a 350°F (175°C) oven for 8–10 minutes until warm and crisp outside.
Nutrition (per serving)
Approximate per arepa (1 of 6): 380 calories; 16 g fat; 38 g carbohydrates; 13 g protein; 3 g fiber; 420 mg sodium. Values will vary with cheese choice and exact ingredients.

Leave a Reply