
Quick Recipe Version (TL;DR)
Quick Ingredients
- 4 large egg whites, room temperature
- 1 cup (200 g) granulated sugar (superfine if possible)
- 1/4 teaspoon cream of tartar
- 1/8 teaspoon fine salt
- 1 teaspoon pure peppermint extract
- 1/2 teaspoon vanilla extract (optional)
- Red gel food coloring
- Optional: 2 tablespoons finely crushed peppermint candies or candy canes
- Parchment paper, large piping bag, large star piping tip
Do This
- 1. Preheat oven to 225°F (110°C). Line 2 baking sheets with parchment. Ensure mixing bowl and whisk are completely clean and dry.
- 2. Beat egg whites, cream of tartar, and salt on medium speed until foamy. Gradually add sugar, 1 tablespoon at a time, beating constantly.
- 3. Increase to high speed and beat until very thick, glossy, stiff peaks form. Beat in peppermint (and vanilla, if using).
- 4. Paint 3–4 vertical stripes of red gel food coloring inside a large piping bag. Fill gently with meringue.
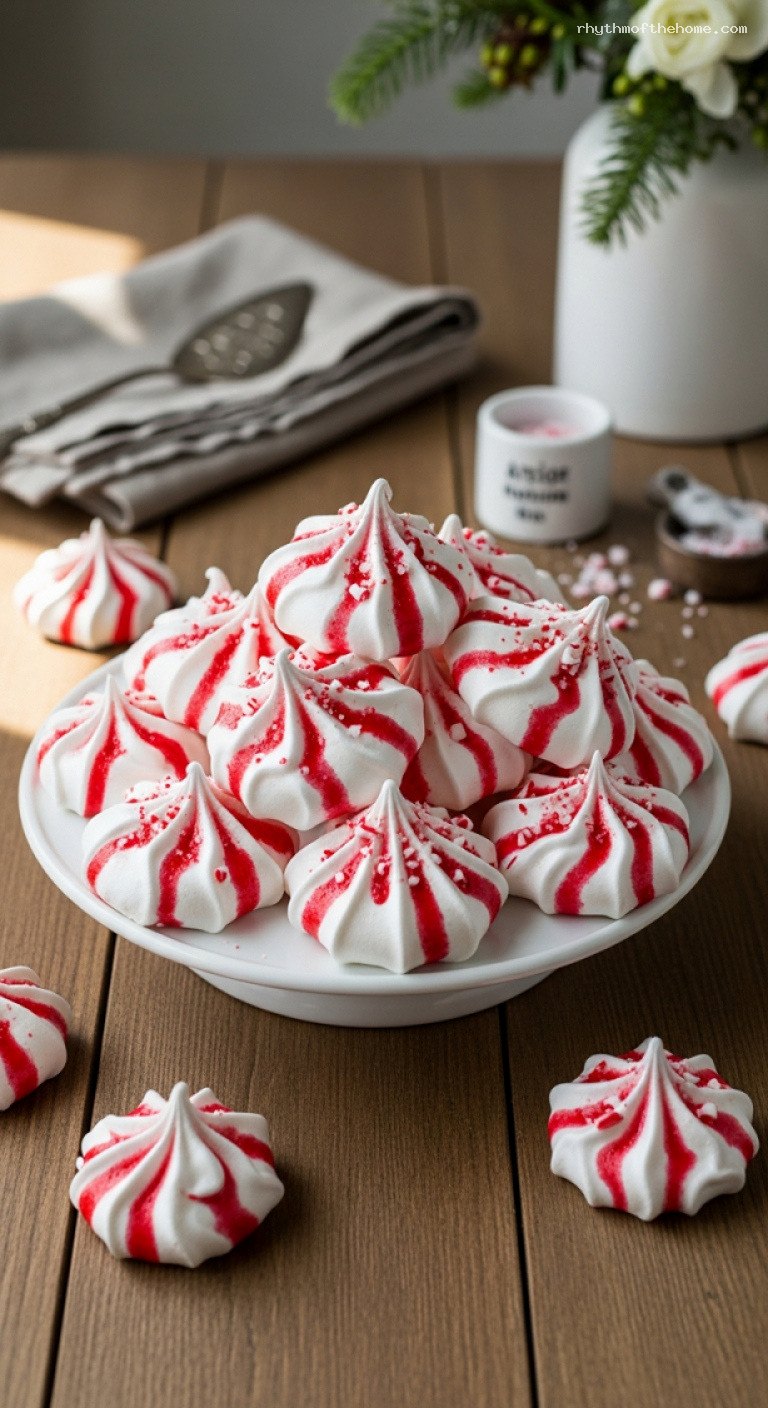
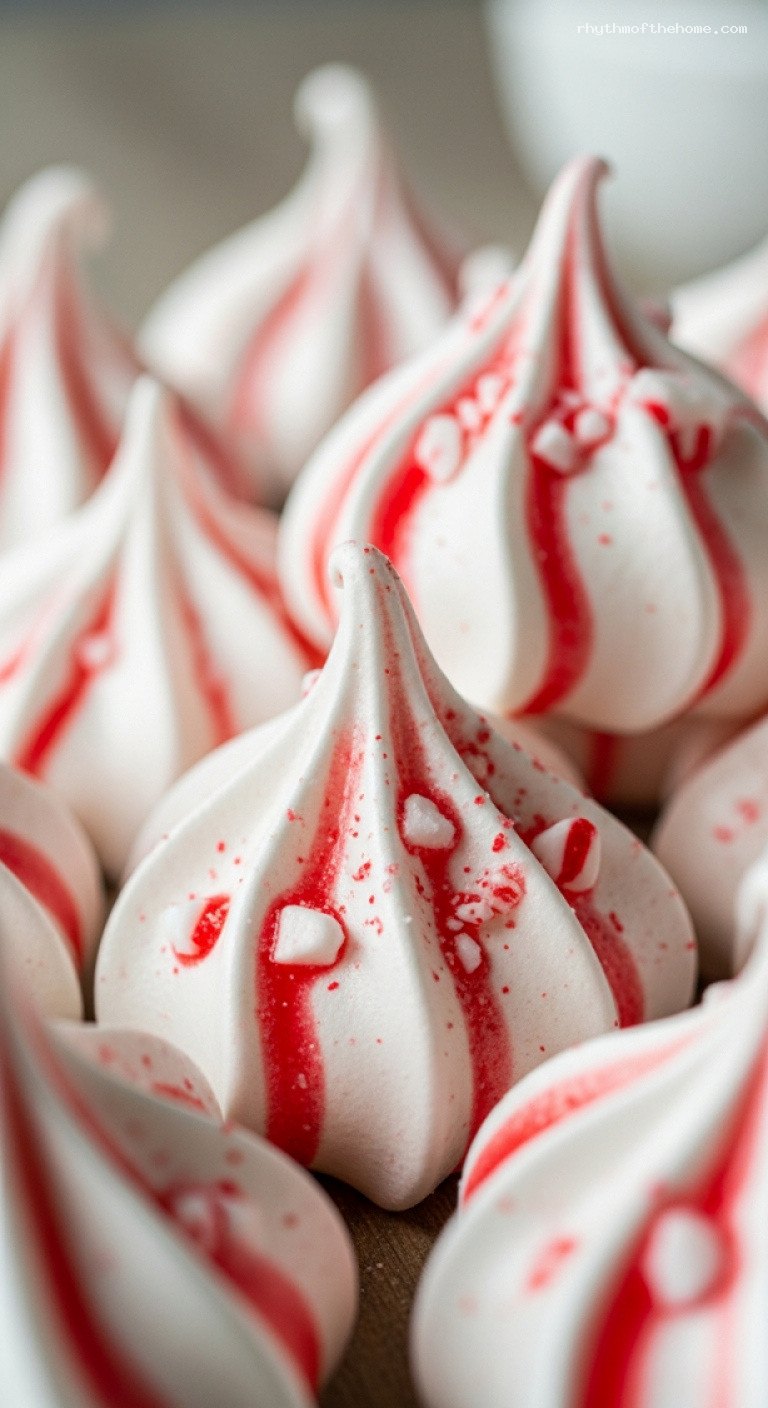
- 5. Pipe 1½-inch swirled “kisses” onto prepared sheets, spacing about 1 inch apart. Sprinkle with crushed peppermint, if using.
- 6. Bake 1 hour, then turn oven off and leave meringues inside (door closed) for 30 minutes to dry.
- 7. Cool completely on the pans before gently removing. Store air‑tight at room temperature.
Why You’ll Love This Recipe
- Classic crisp meringues with a cool, clean peppermint flavor that tastes like the holidays in each bite.
- That candy-cane look: pretty red swirls and optional peppermint sprinkle make them stunning on cookie trays.
- Surprisingly simple: just a handful of pantry ingredients and a mixer do most of the work.
- Perfect make-ahead cookie; they keep beautifully and travel well for gifting or cookie exchanges.
Grocery List
- Produce: None
- Dairy: 4 large eggs (you will use the whites only)
- Pantry: Granulated sugar, cream of tartar, fine salt, pure peppermint extract, vanilla extract (optional), red gel food coloring, peppermint candies or candy canes (optional), parchment paper
Full Ingredients
For the Peppermint Meringues
- 4 large egg whites, at room temperature (about 120 g total)
- 1 cup (200 g) granulated sugar (superfine or caster sugar preferred)
- 1/4 teaspoon cream of tartar
- 1/8 teaspoon fine sea salt
- 1 teaspoon pure peppermint extract
- 1/2 teaspoon pure vanilla extract (optional, for a rounder flavor)
For the Candy-Cane Swirl Look
- Red gel food coloring (not liquid; gel holds its color better)
- Optional: 2 tablespoons finely crushed peppermint candies or candy canes, for sprinkling on top
- 1 large piping bag (16-inch works well)
- 1 large star piping tip (such as Wilton 1M or Ateco 824)
- Parchment paper for lining baking sheets
Step-by-Step Instructions
Step 1: Prep the oven, pans, and equipment
Preheat your oven to 225°F (110°C). Line 2 large baking sheets with parchment paper; do not use silicone mats, as meringues dry better on parchment. Set the trays aside.
Make sure your mixing bowl and whisk attachment are very clean, dry, and free from any grease. Glass or stainless-steel bowls work best; avoid plastic if possible. Even a tiny bit of fat can prevent your egg whites from whipping properly.
Separate the eggs while they are cold (it is easier that way), placing the whites into your mixing bowl and the yolks into a separate container. You need 4 large egg whites total. Let the whites stand at room temperature for about 15 minutes so they whip up with better volume.
Step 2: Start whipping the egg whites
Add the cream of tartar and salt to the egg whites in the bowl of a stand mixer fitted with the whisk attachment (or use a large bowl and a hand mixer). Begin beating on medium speed until the mixture is frothy and opaque, 1 to 2 minutes.
Once the whites look foamy with small, fine bubbles, you are ready to start adding sugar. This slow start helps build a stable structure for the meringue so it can hold its shape in the oven.
Step 3: Add sugar gradually and whip to stiff peaks
With the mixer running on medium speed, add the sugar very slowly, about 1 tablespoon at a time, allowing each spoonful to dissolve before adding the next. This should take 5 to 7 minutes. Rushing this step can make the meringue grainy or cause it to weep during baking.
When all the sugar has been added, increase the mixer speed to medium-high or high and continue beating until the meringue is very thick, glossy, and holds stiff peaks, 4 to 6 minutes more. A stiff peak will stand straight up without drooping when you lift the whisk from the bowl.
Rub a tiny bit of meringue between your fingers; if you still feel sugar grains, keep beating briefly until almost completely smooth.
Step 4: Flavor the meringue
Once stiff peaks have formed and the sugar is mostly dissolved, stop the mixer and add the peppermint extract and optional vanilla extract to the bowl. Beat on low speed just until the flavorings are fully incorporated, about 10 to 15 seconds.
Taste a small dab of meringue (use a clean spoon) to check the peppermint level. If you prefer a stronger mint flavor, you may add up to 1/4 teaspoon more peppermint extract, but add it gradually to avoid overpowering the cookies. Do not overmix at this stage; you want to keep as much air in the meringue as possible.
Step 5: Prepare the candy-cane swirl piping bag
Fit a large piping bag with a large star tip and stand the bag in a tall glass or pitcher, folding the top of the bag down over the rim. Using a food-safe paintbrush or the back of a small spoon, paint 3 to 4 vertical stripes of red gel food coloring inside the bag, starting near the tip and going about halfway up the bag. Space the stripes evenly around the inside so the meringue will pick up red streaks as it is piped.
Working gently so you do not deflate the meringue, spoon the peppermint meringue into the prepared bag, trying not to smear away the painted stripes. Unfold the top of the bag and twist it closed to seal.
If you do not want to pipe, you can instead drop heaping teaspoonfuls of meringue onto the baking sheet and use a toothpick dipped in gel coloring to swirl in red streaks on top.
Step 6: Pipe the meringue cookies
On the prepared baking sheets, pipe small swirled “kisses” about 1½ inches (4 cm) wide, holding the piping bag perpendicular to the tray. Apply even pressure, then stop squeezing and lift straight up to create a nice peak. Leave about 1 inch (2.5 cm) between cookies; they will not spread much but need room for air circulation to dry evenly.
If using, sprinkle a pinch of finely crushed peppermint candy or candy canes over the tops of the freshly piped meringues. This adds sparkle and extra mint flavor, but keep the pieces small so they do not melt into large sticky spots.
Step 7: Bake low and slow, then dry
Place the baking sheets in the preheated 225°F (110°C) oven. Bake for 1 hour, resisting the urge to open the door, which can introduce moisture and cause cracking. After 1 hour, quickly check one meringue: it should feel dry and lift easily off the parchment, though the very center may still be slightly soft.
Turn the oven off and leave the meringues inside, with the door closed, for an additional 30 minutes to dry out further. This gentle drying time helps ensure crisp, light cookies with minimal browning.
After 30 minutes, remove the baking sheets from the oven and let the meringues cool completely on the pans. Once cool, they should be dry, crisp, and hollow-sounding when tapped lightly on the bottom.
Pro Tips
- Keep fat away: Any trace of egg yolk, oil, or grease in the bowl will prevent your egg whites from whipping properly. If in doubt, wipe the bowl and whisk with a little vinegar and dry thoroughly before starting.
- Use superfine sugar: If you do not have caster sugar, pulse regular granulated sugar in a food processor for 20 to 30 seconds. Finer sugar dissolves more easily, giving you smoother, shinier meringues.
- Add sugar slowly: Sprinkle it in 1 tablespoon at a time. Rushing this step is the most common cause of gritty or weepy meringues.
- Watch for humidity: Meringues dry best on cool, dry days. If your kitchen is very humid, they may take longer to dry and can soften more quickly after baking.
- Avoid overbrowning: If you notice color developing, your oven may run hot. Next time, bake at 200°F (95°C) and extend the time slightly, or crack the door open just a tiny bit during the last 15 minutes.
Variations
- Chocolate-dipped peppermint meringues: Once completely cool, dip the bottoms or sides of the meringues in melted dark or semisweet chocolate. While the chocolate is still wet, sprinkle with crushed peppermint candy, then let set on parchment.
- Red-and-green swirl kisses: Paint alternating red and green gel stripes inside the piping bag for a more colorful, festive look. Keep the same peppermint flavor or add a touch of vanilla and almond extract instead.
- Peppermint meringue nests: Instead of small kisses, pipe 3-inch circles with slightly raised edges to form nests. Bake and dry as directed, then fill just before serving with whipped cream and fresh berries for a light holiday dessert.
Storage & Make-Ahead
Allow meringues to cool completely before storing. Place them in an airtight container, layering with parchment paper to prevent sticking. Store at cool room temperature, away from moisture and direct sunlight, for up to 1 week. Do not refrigerate; the humidity in the refrigerator will soften them.
For longer storage, you can freeze baked, fully cooled meringues in an airtight container for up to 1 month. Thaw in the closed container at room temperature before opening, to avoid condensation forming on the cookies.
These are excellent make-ahead treats for holidays and parties, as they stay crisp when properly stored and are ready to arrange on a platter whenever you need them.
Nutrition (per serving)
Approximate values per cookie (based on 40 cookies, without chocolate or extra toppings): about 25 calories; 0 g fat; 6 g carbohydrates; 0 g fiber; 6 g sugar; 0.3 g protein; 15 mg sodium. These numbers are estimates and will vary slightly based on the exact size of your cookies and any added toppings.

Leave a Reply