
Quick Recipe Version (TL;DR)
Quick Ingredients
- 1 cup (226 g) unsalted butter, very soft
- 2/3 cup (80 g) powdered sugar
- 1/4 cup (50 g) granulated sugar
- 1 large egg, room temperature
- 1 1/2 tsp vanilla extract
- 1/2 tsp fine salt
- 2 cups (240 g) all-purpose flour
- 1/4 cup (30 g) cornstarch
- 1–2 Tbsp milk, as needed for piping
- 6 oz (170 g) dark or milk chocolate, chopped
- 1 tsp neutral oil (optional, for smoother dipping)
- 1/3 cup (35–40 g) finely chopped nuts (pistachios, hazelnuts, or almonds)
Do This
- 1) Line 2 baking sheets with parchment and preheat oven to 350°F (175°C). Let butter and egg come to room temperature.
- 2) Beat butter, powdered sugar, and granulated sugar until very light and creamy, 3–4 minutes. Mix in egg, vanilla, and salt.
- 3) Sift in flour and cornstarch; beat on low just until combined. Add 1–2 Tbsp milk, a little at a time, until dough is soft enough to pipe but still thick.
- 4) Transfer dough to a piping bag fitted with a large open star tip. Pipe 2–2 1/2 inch S-shapes or rosettes onto trays. Chill trays 20–30 minutes.
- 5) Bake 10–12 minutes until edges are just turning light golden. Cool completely on a rack.
- 6) Melt chocolate with oil (if using). Dip one half of each cookie in chocolate, let excess drip, then sprinkle with chopped nuts. Set on parchment until chocolate firms.
Why You’ll Love This Recipe
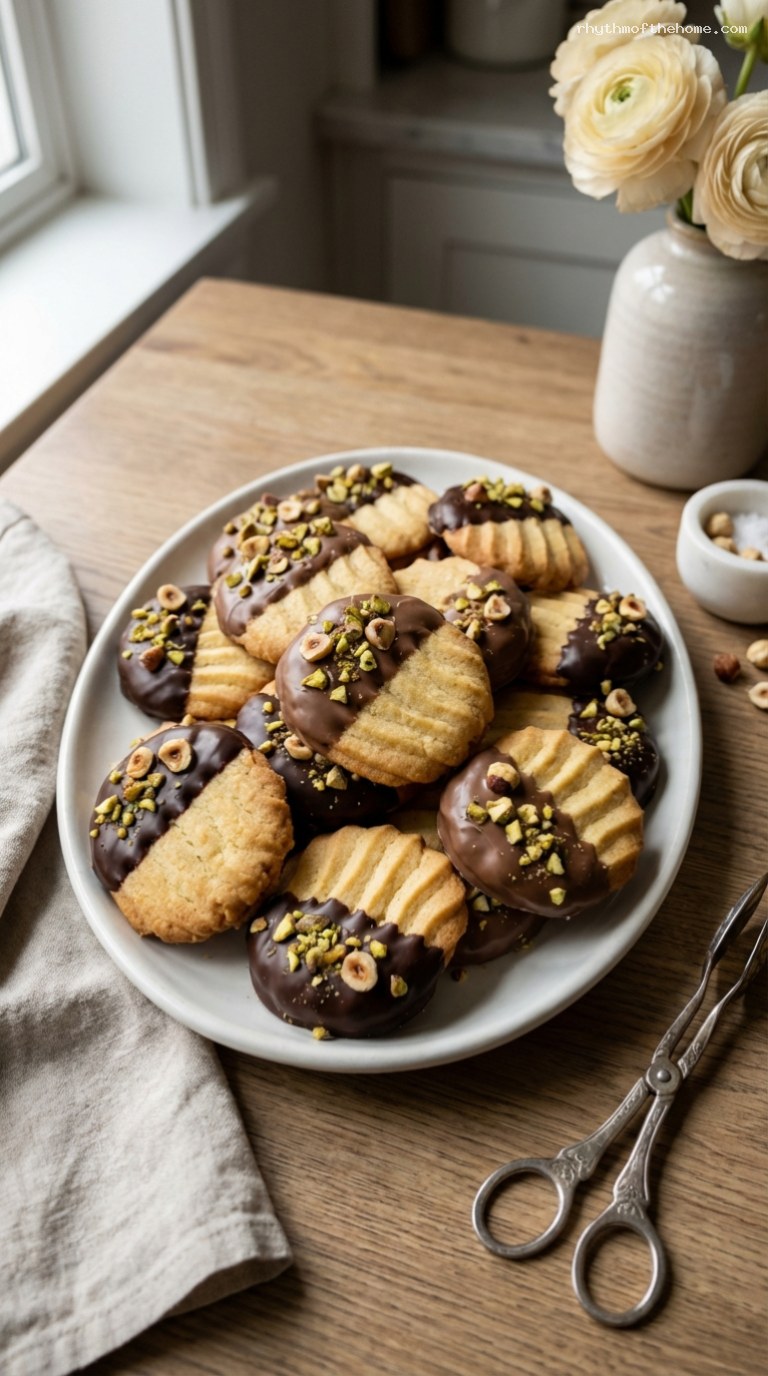
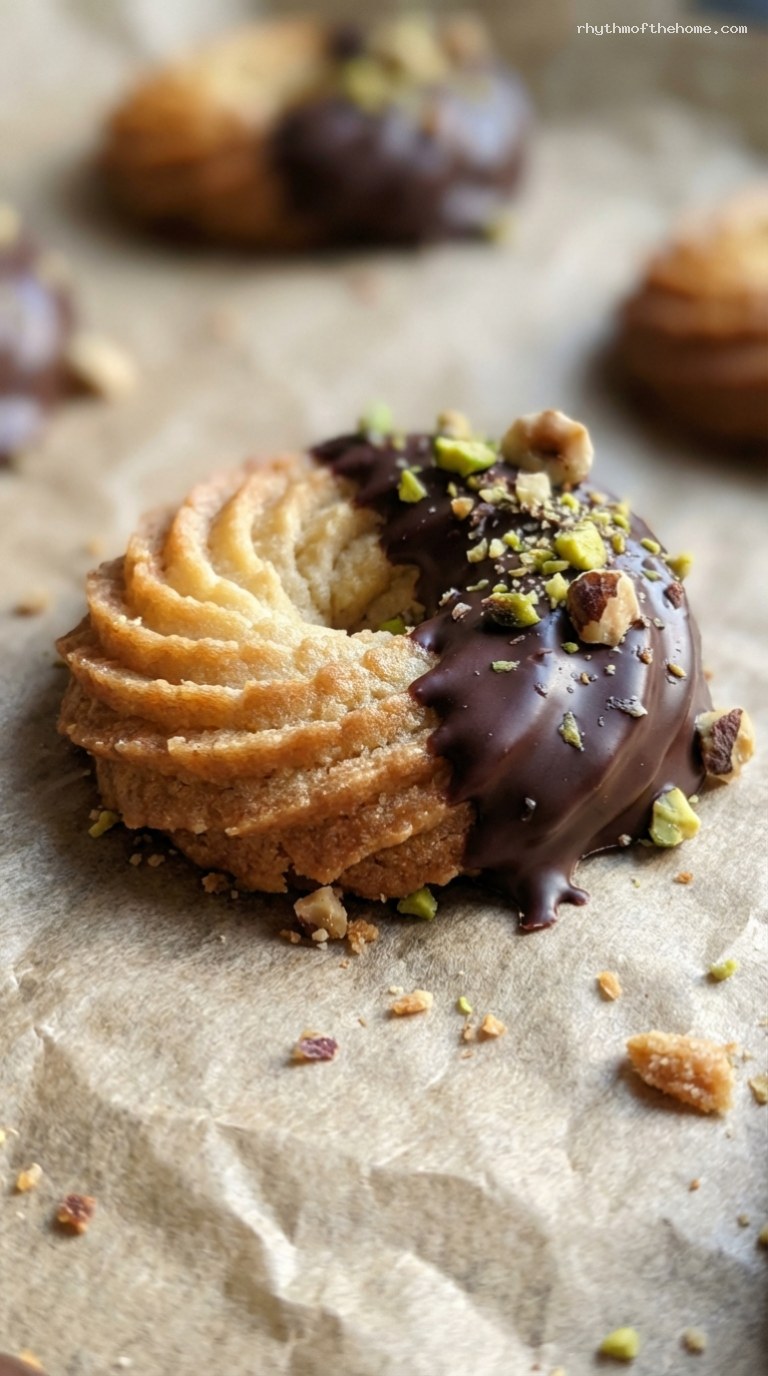
- Delicately crisp, buttery cookies with pretty piped ridges that look bakery-worthy but are simple to make at home.
- Half-dipped in glossy dark or milk chocolate, with a sprinkle of nuts for contrast in flavor and crunch.
- The dough is easy to pipe, holds its shape in the oven, and can be customized with different chocolate and nut combinations.
- Perfect for gifting, cookie trays, holidays, or an everyday treat with a cup of coffee or tea.
Grocery List
- Produce: None required (optional: fresh berries or mint for serving/decoration).
- Dairy: Unsalted butter, milk (any kind for thinning the dough if needed).
- Pantry: Powdered sugar, granulated sugar, all-purpose flour, cornstarch, fine salt, vanilla extract, dark or milk chocolate, neutral oil (optional), nuts (pistachios, hazelnuts, or almonds).
Full Ingredients
For the Butter Cookies
- 1 cup (226 g) unsalted butter, very soft but not melted
- 2/3 cup (80 g) powdered sugar, sifted
- 1/4 cup (50 g) granulated sugar
- 1 large egg, room temperature
- 1 1/2 teaspoons pure vanilla extract
- 1/2 teaspoon fine sea salt (or 1/4 teaspoon table salt)
- 2 cups (240 g) all-purpose flour
- 1/4 cup (30 g) cornstarch
- 1–2 tablespoons milk (whole, 2%, or any neutral milk), only as needed to reach a pipeable consistency
For Dipping & Decorating
- 6 ounces (170 g) dark or milk chocolate, finely chopped (or high-quality chocolate chips)
- 1 teaspoon neutral oil (such as canola, sunflower, or grapeseed), optional for smoother, shinier chocolate
- 1/3 cup (35–40 g) finely chopped nuts, such as:
- Pistachios (for a green, colorful contrast)
- Toasted hazelnuts
- Toasted almonds
Step-by-Step Instructions
Step 1: Prepare your pans and ingredients
Line 2 large baking sheets with parchment paper and set aside. Fit a large piping bag with a large open star tip (such as Wilton 1M or Ateco 827) and set that aside as well.
Make sure your butter is very soft: it should give easily when pressed but not be greasy or melted. If it is still firm, cut it into small cubes and let it sit at room temperature for 15–20 minutes. Bring your egg to room temperature by placing it (still in the shell) in a bowl of lukewarm water for 5–10 minutes.
Preheat your oven to 350°F (175°C), but you will not bake until after chilling the piped cookies. Prepping now simply ensures the oven is ready when you are.
Step 2: Cream the butter and sugars until very light
In a large mixing bowl (or the bowl of a stand mixer fitted with the paddle attachment), add the softened butter, powdered sugar, and granulated sugar.
Beat on medium-high speed for 3–4 minutes, scraping down the bowl once or twice, until the mixture is very light, pale, and fluffy. Proper creaming is key for delicate, melt-in-your-mouth texture.
Add the egg, vanilla extract, and salt. Beat again on medium speed just until fully combined and smooth, about 30–45 seconds. Do not worry if the mixture looks slightly separated at first; it will come together as you mix.
Step 3: Add dry ingredients and adjust consistency
In a small bowl, whisk together the flour and cornstarch to combine and remove any lumps. Sift this mixture over the butter mixture to keep the batter smooth.
Beat on low speed, just until no dry streaks remain. The dough will be quite thick, almost like a very stiff cake batter. To make it pipeable, add milk 1 teaspoon at a time (up to about 1–2 tablespoons total), mixing briefly after each addition.
The ideal consistency is soft enough to pipe through the star tip with firm, steady pressure, but still thick enough to hold sharp ridges. If it is too stiff to pipe, add a touch more milk. If it becomes too soft and loses shape when piped, beat in a tablespoon or two of additional flour.
Step 4: Pipe the cookies onto trays
Transfer the dough to your prepared piping bag, filling it about two-thirds full so it is easy to handle. Twist the top of the bag to push the dough down and remove air pockets.
Holding the piping bag at a 45-degree angle, pipe 2–2 1/2 inch long S-shapes or tight rosettes onto the parchment-lined trays, spacing them about 1 1/2 inches apart. Try to keep the cookies similar in size so they bake evenly.
If any cookies have tails or irregular edges, you can gently nudge them into shape with a fingertip lightly dipped in water.
Step 5: Chill the piped cookies
Place the baking sheets with the piped cookies into the refrigerator and chill for 20–30 minutes, or until the dough feels firm to the touch. Chilling helps the cookies keep their ridged, piped shapes and prevents them from spreading too much in the oven.
While the cookies chill, make sure your oven is fully preheated to 350°F (175°C) with a rack in the center position.
Step 6: Bake until lightly golden at the edges
Bake one sheet at a time on the center rack for 10–12 minutes, or until the edges of the cookies are just starting to turn a light golden color and the tops look set and dry. The cookies should remain quite pale overall; do not overbake or they will lose their delicate texture.
Remove the tray from the oven and let the cookies cool on the baking sheet for 5 minutes to firm up, then carefully transfer them to a wire rack to cool completely. Repeat with the second tray.
Let all cookies cool completely before dipping in chocolate, or the chocolate may slide off or bloom.
Step 7: Dip in chocolate and add crushed nuts
Place the chopped chocolate in a heatproof bowl. You can melt it either in the microwave or over a double boiler:
- Microwave method: Microwave in 20–30 second bursts, stirring well between each, until nearly melted. Stir in the neutral oil (if using) and continue stirring until smooth and glossy.
- Double boiler method: Set the bowl over a pot of barely simmering water (without letting the bottom of the bowl touch the water). Stir until melted and smooth, then stir in the oil if using.
Pour the chopped nuts into a small shallow bowl.
Working one cookie at a time, dip one end or one half of each cooled cookie into the melted chocolate, letting excess chocolate drip back into the bowl. Lightly scrape the back of the cookie against the rim of the bowl to avoid thick drips.
Immediately sprinkle the chocolate-covered portion with chopped nuts, or dip just the edge into the nuts for a neat line. Place the cookies on a sheet of parchment or a cooling rack to set until the chocolate is firm and dry to the touch. If your kitchen is warm, you can refrigerate them for 10–15 minutes to speed this up.
Pro Tips
- Get the right piping consistency: Add milk very gradually. The dough should be soft but still hold defined ridges from the star tip. If your hand aches while piping, it is probably a bit too stiff and needs a tiny splash more milk.
- Use a large star tip: Smaller tips make piping too difficult and can cause the bag to burst. A large open star (like Wilton 1M or similar) gives beautiful ridges and makes the job easier.
- Chill for clean shapes: Do not skip chilling the piped dough. This is what keeps those crisp, bakery-style ridged edges and prevents the cookies from flattening.
- Choose good chocolate: Because the chocolate is a major flavor here, use a bar you enjoy eating on its own. Couverture or higher cocoa butter content will melt and coat more smoothly.
- Toast the nuts: Lightly toast your nuts in a dry skillet or 325°F (165°C) oven for 5–8 minutes until fragrant, then cool and chop. The flavor and crunch are significantly better.
Variations
- Citrus butter cookies: Add 1–2 teaspoons of finely grated lemon or orange zest to the butter and sugar mixture before creaming. Dip in dark chocolate for a lovely contrast.
- Jam sandwich cookies: Pipe smaller rosettes, bake as directed, then sandwich pairs together with a small dollop of raspberry or apricot jam. Skip the chocolate dip or just drizzle instead of full dipping.
- Double chocolate version: Replace 2 tablespoons (about 15 g) of the flour with unsweetened cocoa powder to make chocolate butter cookies, then dip in milk chocolate and sprinkle with crushed hazelnuts.
Storage & Make-Ahead
Store the finished, chocolate-dipped cookies in an airtight container at cool room temperature for up to 5 days. If your kitchen is warm or humid, you can refrigerate them, but bring them to room temperature before serving for the best texture and flavor.
To make ahead, you can pipe the dough onto trays, freeze until solid, then transfer the unbaked cookies to a freezer bag and store for up to 1 month. Bake from frozen at 350°F (175°C), adding 1–2 extra minutes to the baking time. You can also bake the cookies ahead and freeze them (undipped) in an airtight container for up to 2 months; thaw completely, then dip in chocolate and decorate.
Nutrition (per serving)
Approximate values per cookie (assuming 30 cookies): about 150 calories, 10 g fat, 15 g carbohydrates, 1–2 g fiber, 8–10 g sugar, and 2 g protein. Values will vary slightly depending on whether you use dark or milk chocolate and the type and amount of nuts.

Leave a Reply