

Nobody in the modern world can imagine living without a fridge. This home appliance has become an indispensable addition to every home considering how practical it is. You can maintain food fresh for longer and save a lot of money in the process. Refrigerators have a long lifespan, but they will break down eventually. If you’re interested in maintaining your fridge in top working condition for as long as possible, it’s recommended to clean the coils.
There are lots of disadvantages to neglecting your dirty refrigerator coils. The appliance will have to work extra hard to keep your food cold because of all that dust and grime in the condenser coils. It consumes more power which translates to increased energy bills. There’s also a greater risk of the appliance breaking down sooner than expected. This can incur considerable repair expenses.
A well-maintained refrigerator needs to have its coils cleaned regularly. The process isn’t particularly difficult, but there’s some prep work required to do it properly. In this article, we’ll explore the essential steps required for a thorough clean of the fridge’s condenser coils. By following this guide, you won’t have to worry about the health of the refrigerator. Here’s how to clean the coils to ensure it functions at its peak.
1. Locate the Coils
Depending on the refrigerator model, coils can be positioned in various places of the fridge. Before you start inspecting your own appliance, make sure it’s disconnected from a power source by unplugging the unit. The food won’t spoil during the cleaning process because the task shouldn’t take longer than 15 minutes. Condenser coils are exposed on the body of the refrigerator. Whereas older models typically have the coils right behind them, more recent fridges have them at the bottom. You might have to remove a panel if the coils aren’t fully exposed.
2. Vacuum the Coils
Condenser coils need to be dusted first before you can properly clean them. Use the narrow nozzle of the vacuum to get rid of all the dust and debris stuck between the coils. You might as well clean the area underneath the fridge if you moved the appliance.
3. Brush Away the Dirt
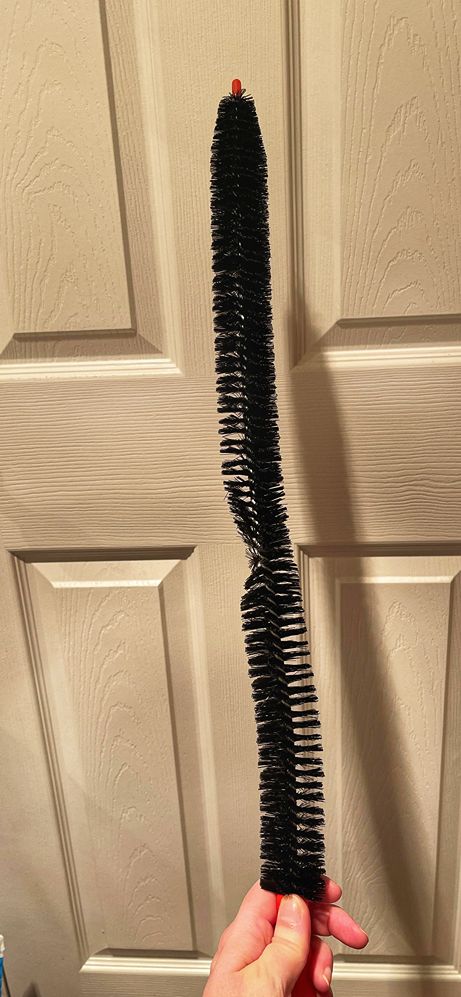
With the help of a brush designed to clean condenser coils like this one, scrape away some of the tougher dirt particles that can’t be vacuumed. Brush carefully between the coils to remove larger clumps of grime that can be then vacuumed more easily. It’s recommended to use a flashlight if there’s poor visibility in the area. Alternating between brushing and vacuuming should efficiently clean the refrigerator coils.
4. Restart the Fridge
After you’re satisfied with the cleaning job, it’s time to restart the fridge. Put back the back panel if you have one that needed to be removed. Plug the appliance back into the power outlet and enjoy your refrigerator working in top condition.

Leave a Reply